The Buildings

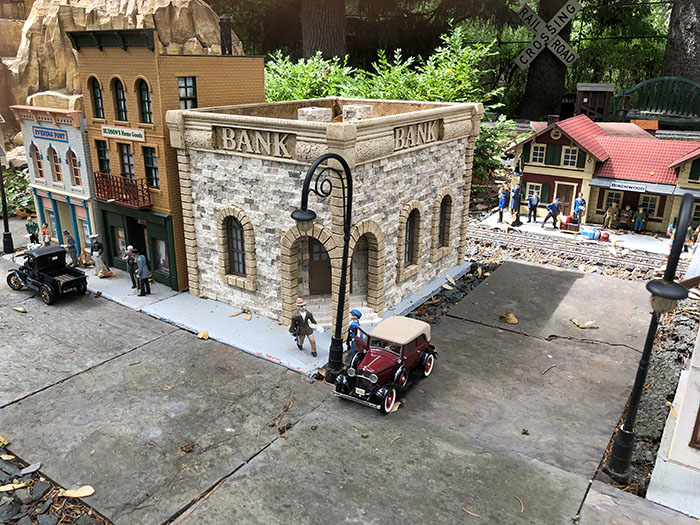
This page was originally posted while the layout was in the making. I showed some of the buildings that were being prepared for the layout. But now much better pictures of them are found in the slide show on the main page. I have narrowed this down to a few buildings deserving special commentary, or more importantly, series of pictures showing the build process.


This set of Old West buildings is my finished winter project for 2021-2022, expanding the Old West town on the layout expansion that is now complete as of 2022.

More about building the Old West, Part 2, on this page.


This is my finished winter project for 2020-2021 - the first of several sets of Old West buildings planned. The layout expansion is to be the home of an Old West town. The expansion area is far from complete as of 2021, but these finished buildings were set in place temporarily just to start getting a feel for what Old West might look like. Notice there is no mountain yet in this picture.

More about building these Old West buildings on this page.


Here is my finished winter project for 2019-2020 - the stone bank building, with a robbery in progress.

More about building the bank on this page.


Here is my finished winter project for 2017-2018 - a redwood lodge building. This is definitely the most ambitious undertaking I have been silly enough to embark upon to date. I wanted a winter project. But I didn't mean all winter!

More about building the lodge on this page.


Part of what made the redwood lodge project more involved was a finished interior, complete with lights, furniture, and people.

Since winter insisted on continuing well into what should have been spring (record snowfall in mid-April), I had time for a quicker second winter project 2017-2018. I had seen some scratch built stone buildings and really liked them. So I decided to give it a try. The stone looks realistic because the stones are real, each set individually. The recessed windows were made especially for stone models, and were purchased from the same place that sells the tiny stones. The stones are cut, but still rough and I had to file down the ends of most of them to square them up. Fortunately the stone is relatively soft and easy to file or cut. You don't get any real size perspective from this picture, so just know that the front of the building is 12 inches high.

More about scratch building with stone on this page.


I decided to do a partial interior setting in this building. Only the front shop area has a detailed interior, the rest has the windows covered with curtain images. The interior is also lighted for extra character at night (the brass light fixture is real). I found tiny scale model grocery items to fill the shelves toward the front. The back drop is a laser printed image that makes the store area appear deeper.

I was intrigued by examples of cordwood masonry - which I had never heard of before - that we saw on a trip to Door County, Wisconsin. I was also intrigued by the various examples of sod roofs. There seems to be disagreement about who came up with cordwood masonry first, but the sod roof thing seems pretty Scandanavian. I decided to combine both features into a single building that I scratch built over the winter of 2018-2019.

This scratch built log cabin was a birthday gift from my father (in 2016). He took up woodworking as a hobby when he retired. He has built quite a few really nice things including some very nice oak furniture along with a lot of smaller items such as model sleighs, wagons, and carousels that are popular items at Christmas. Every one of his six children and many of the grandchildren now have one of his collectibles.

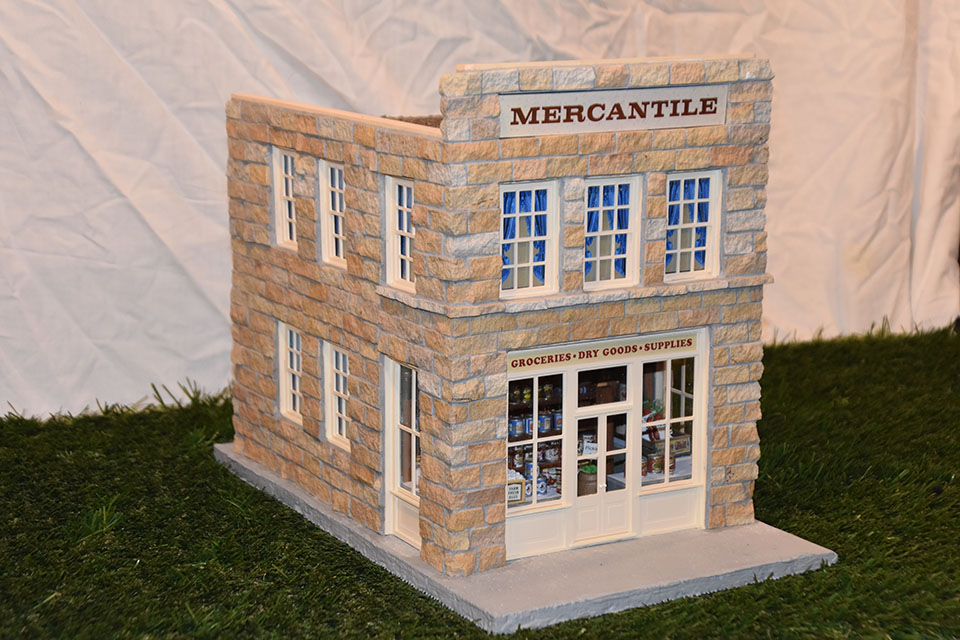
He took an interest in model buildings after seeing the collection of mostly kit built and a few eBay items that I had accumulated. He saw this as a new challenge, and new challenges are what facinate him most.


He couldn't totally surprise me with the log cabin since he needed to ask a lot of questions about scale, etc. He had asked what sort of building I might be interested in, and I suggested a log cabin - I didn't ask for anything too exotic since I knew scratch building anything was a lot of work.

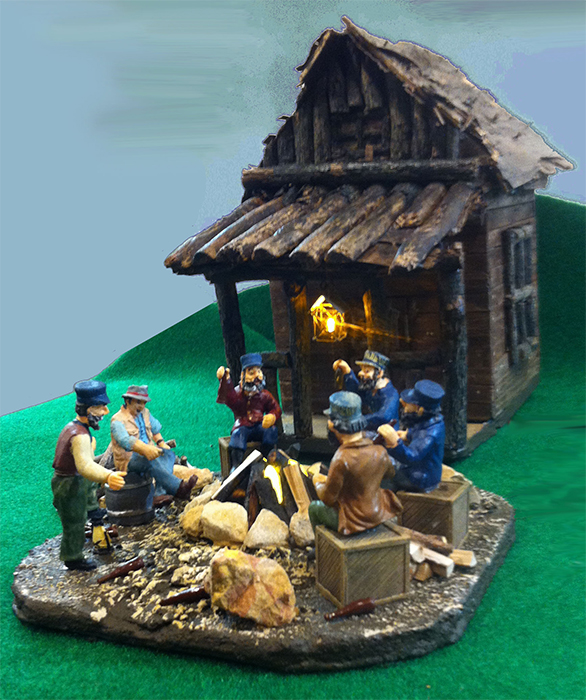
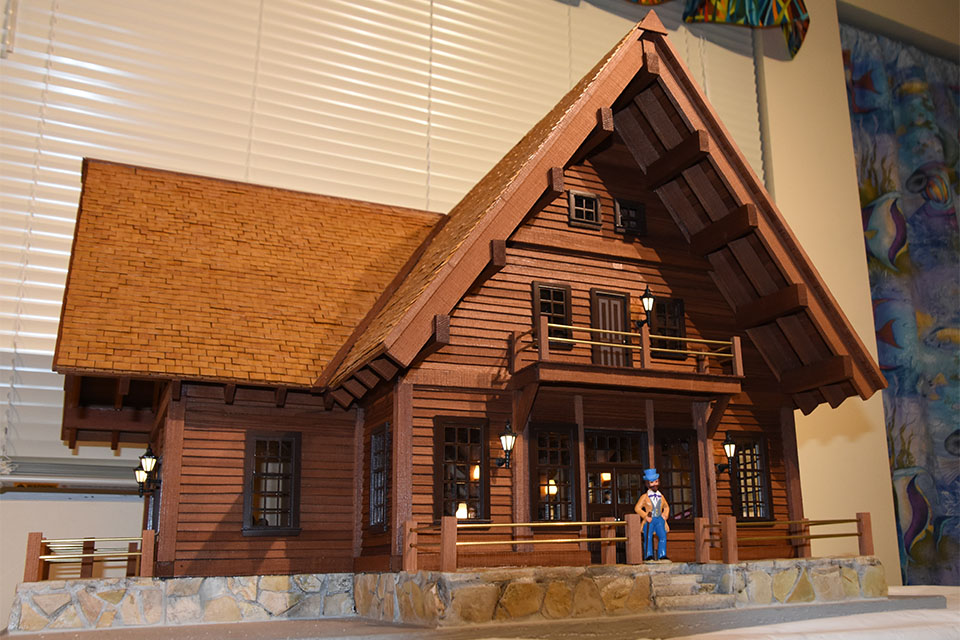
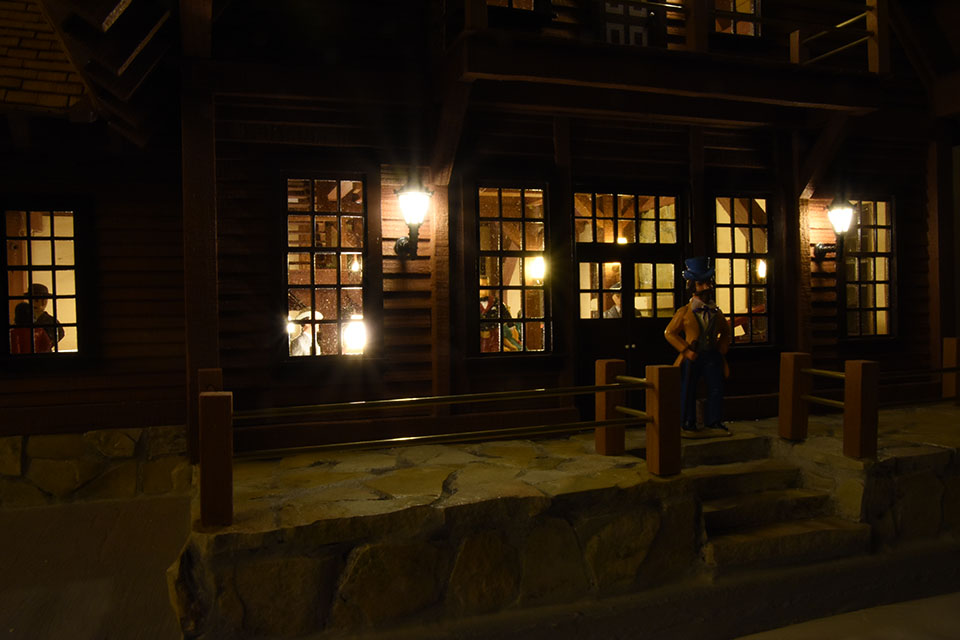
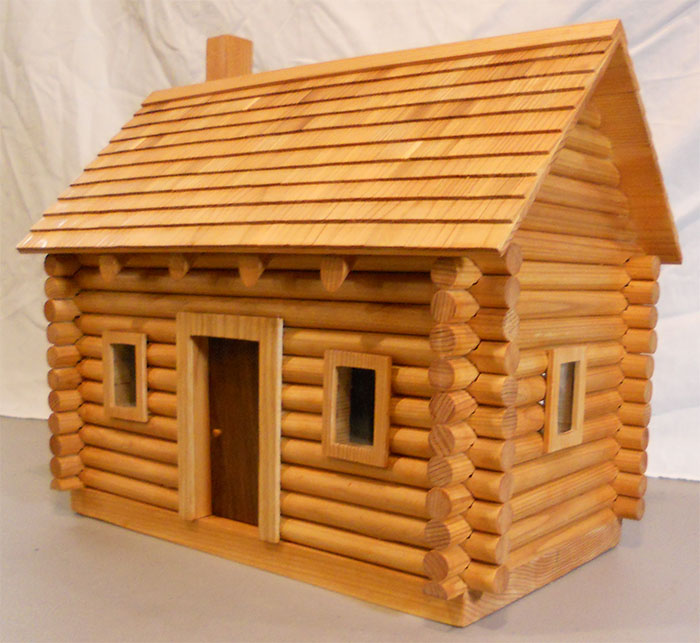
We live 300 miles apart, so I didn't get to do any sneak peeking while he was at work. The first time I saw a picture of the log cabin was on my birthday.

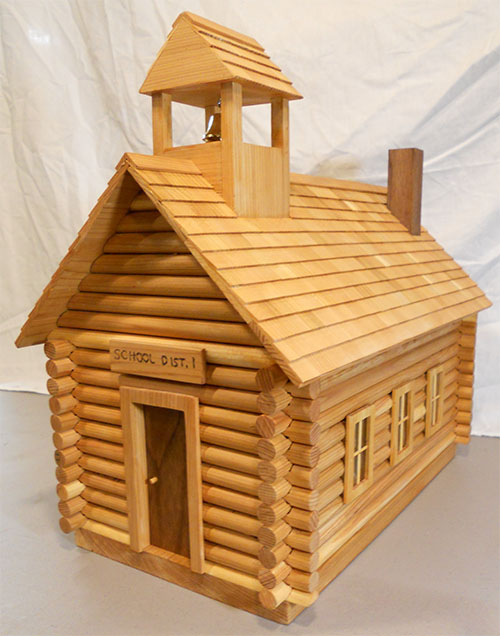
But he did still manage to surprise me with a bonus: A school house.

Dad fabricated every log and cut every one to fit just like building a real log building. He also hand cut each of the little cedar shakes on the roof of each building. There are about 240 shakes on the log cabin, and about 480 on the school house.

I'll be revisiting my building layout plan to be sure these get a prominent showcase spot on the layout!


Joy was about to throw out an old dilapidated bird house that was fashioned like a log cabin. I thought it had character worth saving. So I gave it a few coats of clear acrylic to try to preserve it in its present state. I also had these hobo characters, and decided they would fit perfectly with the cabin. I built them a campfire that has flickering yellow LED lights in the middle of the partly burned wood in the fire ring. I put a yellow LED in the gas lantern that had been hanging on the front porch of the log cabin. And everything in the camp is glued down so it is just one piece to set on the layout.

Many of the buildings on the layout were built from kits. They are made of molded plastic parts, including entire walls or sections of walls in one single piece. They are relatively easy to put together, but typically require some "enhancements" for outdoor use. The plastic is going to survive the rain, but they are light enough to blow away in just a stiff breeze. So they need anchoring at least. I usually add window treatments, sometimes interior lighting, and so forth.

More about kit bashing the building kits on this page.