Scratch Building the Bank
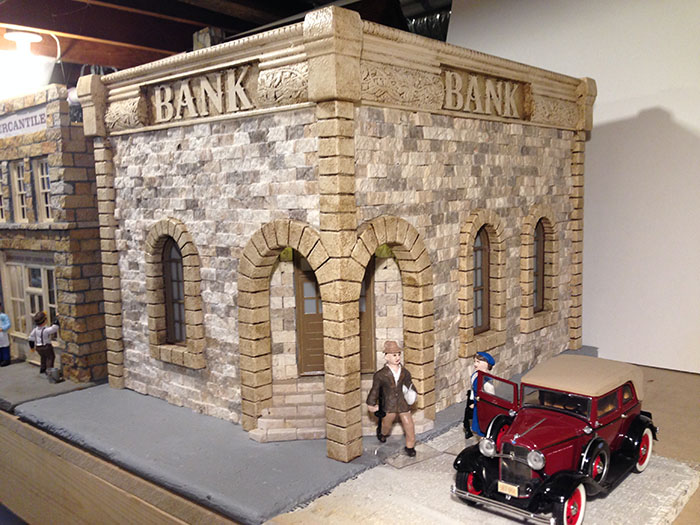
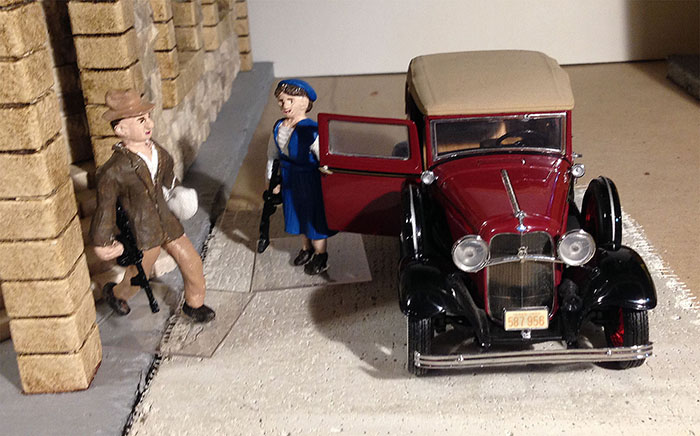
The Minnesota Garden Railroad Society came to visit in the summer of 2019. During that visit, my friend Mike asked me what new buildings I might be contemplating for a winter project. I noted that the town didn’t have a bank yet. Mike turned to another friend also named Jim and asked, “Do you think Jim’s layout needs a bank?” Jim’s answer was “Yeah, but only if it’s being robbed.” We all had a good laugh. Later, I began to contemplate the idea, and figured if it’s going to be getting robbed, it should be getting robbed by notorious bank robbers. Then I wondered if I could find a “Bonnie and Clyde” 1930’s Ford. Sure enough, Franklin Mint had at some point in the past produced a Bonnie and Clyde Special Edition 1932 Ford in 1/24 scale. Perfect. Found one on eBay. And so the bank project began.
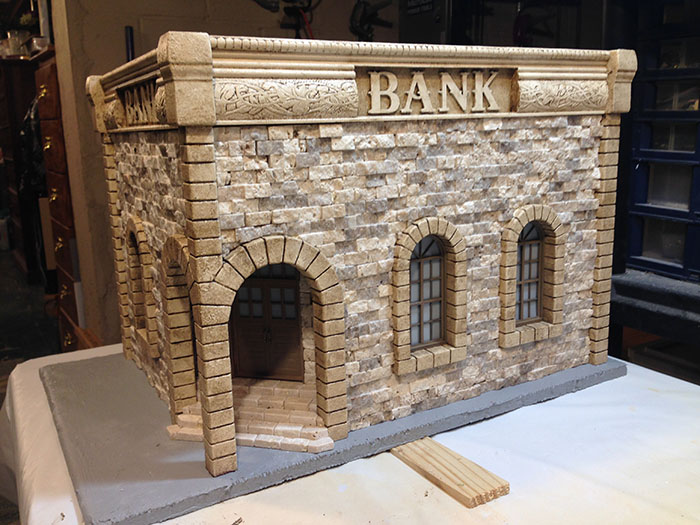
I began the project by looking at a lot of bank buildings on the Internet to get ideas. Google images are great for this sort of “browsing”. I was also looking for a use for some stone tile I had purchased from Lowes some time ago. While originally contemplating that for my first stone building, the Mercantile, I ended up using stone that had been cut specifically for building stone models. I could cross masonry off my list of things to do once I finished the Mercantile. I was now ready to cheat without feeling guilty, and use the stone tiles to hypothetically lay one entire stone wall in one swoop.
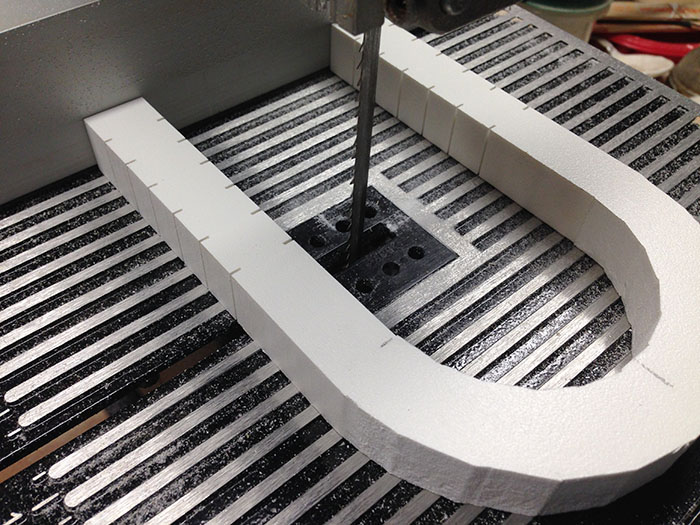
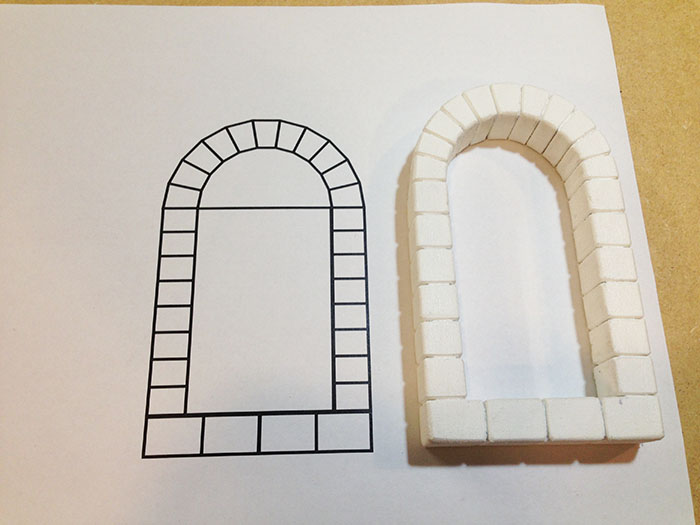
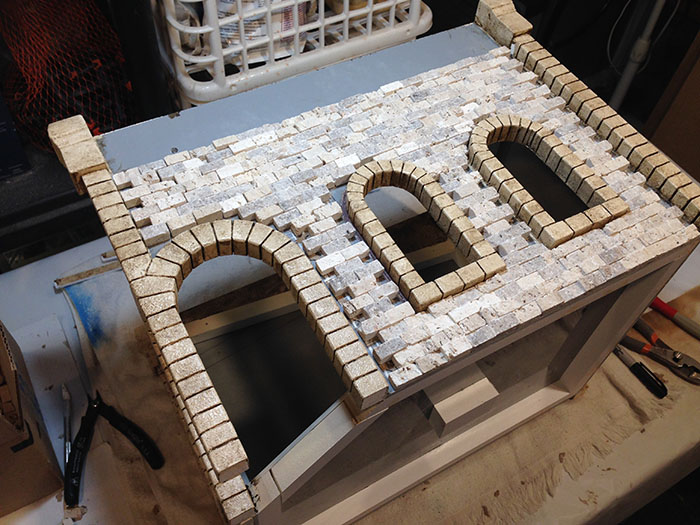
One design feature I was attracted to was stone arch windows and doors. The trick was going to be building them in a structurally sound manner at model scale. I decided to cut them from 3/4" PVC board and then "sculpt" the 1-piece arch to look like multiple stones.
I did a few drawings first to figure out how stones should be cut in the arches. Then after doing initial cuts with the band saw, used a file and sandpaper to finish the job.
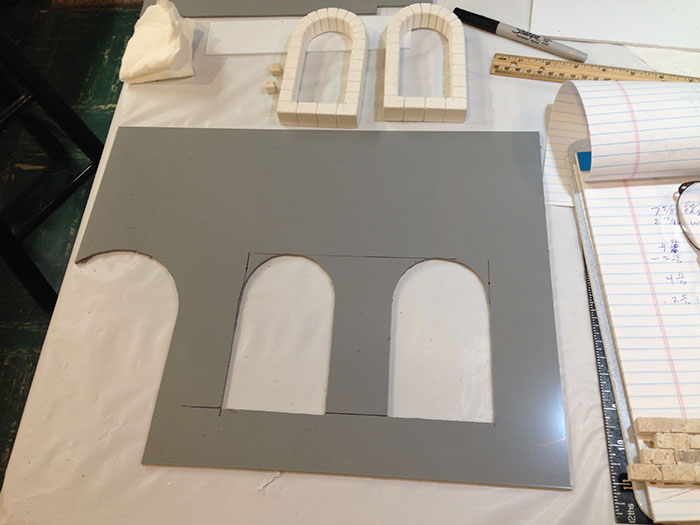
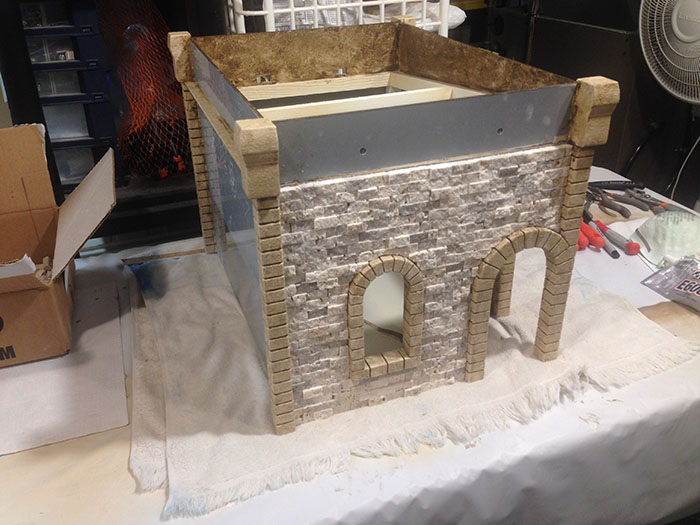
I cut walls from 1/8" ABS sheet.
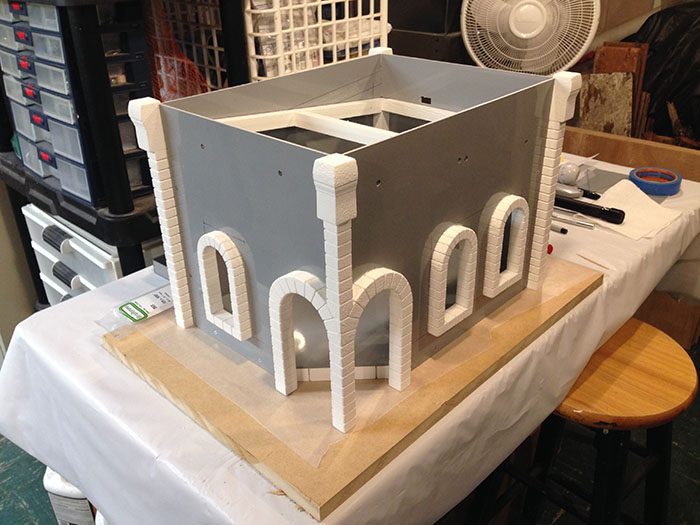
I build a complete shell with ABS walls, PVC board frame inside, and the windows and doors made from PVC board. I also had corner columns made from PVC board, with decorative parts made from PVC trim boards.
I was able to place a lot of stone as one large sheet; however, there was still a need to cut out holes for doors and windows. The stone tiles are actually many small stones glued to a fiberglass backing material that looks like burlap. I found the small stones were pretty much impossible to cut as a single sheet, so ended up pulling out stones around the doors and windows, then cutting and placing each border stone individually.
In theory, I was supposed to be saving time by using the stone tiles. Having done the Mercantile building entirely from individual stone pieces, I am not convinced I saved much time with the tiles.
The most fun part of the design process was creating the windows in 3D CAD software. I was delighted to be able to design windows however I wanted them rather than select stock windows and build around them as I had always done in the past.
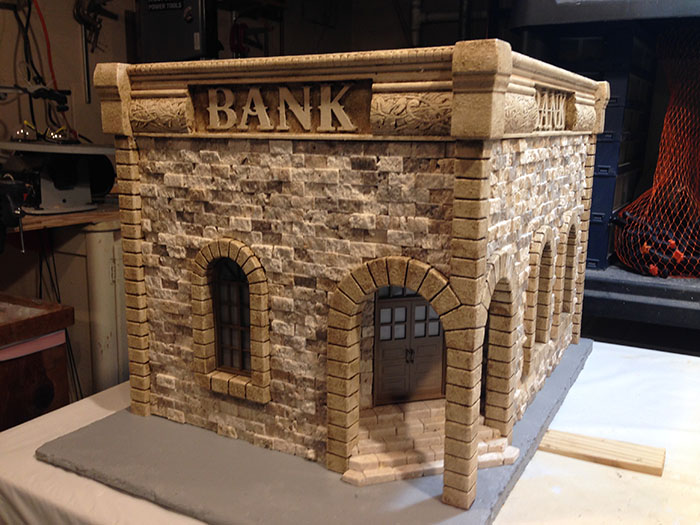
The front steps of the bank are also stone, individually cut and set onto a PVC substrate. The base under the building is cement board (Durock) with a coat of RedGard and then a coat of elastomeric (rubberized) latex gray paint.
I purchased pre-cut lettering from an art supply store and glued them into the cutout in the cornice at the top of the building. The cornice itself is made from trim molding from a building supply store, coated with enough coats of acrylic to almost turn it into plastic. Just a touch of weathering finished the trim parts, both cornice and window/door arches.
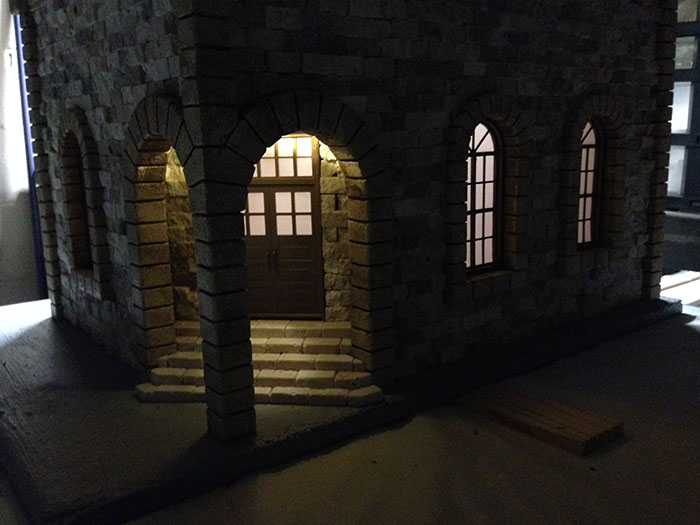
Since I like the effect of a lighted village at night, I wired the bank to be among the lighted buildings in my little town.
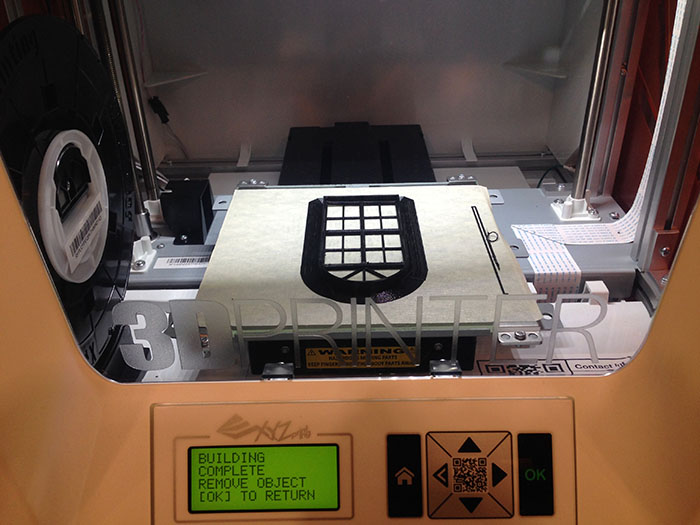
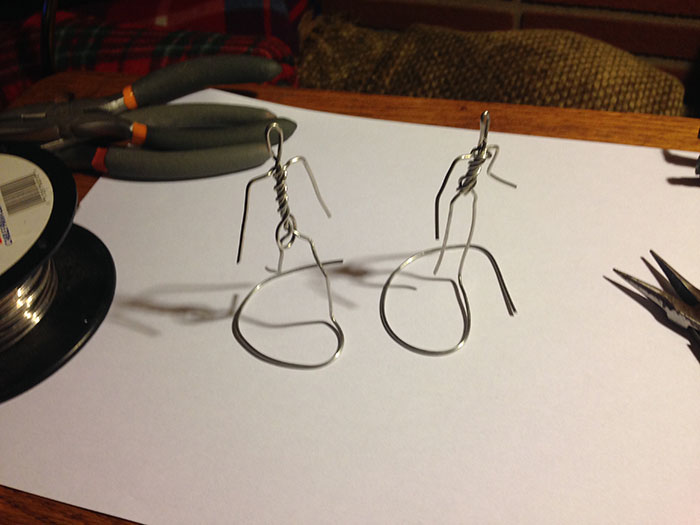
The last detail was to create Bonnie and Clyde themselves. I could find no off-the-shelf characters that would seem suitable, so decided to make them. I contemplated 3D printing the characters, but decided I'd give clay modeling a try since I hadn't done that before. I'm still undecided which is less work - clay modeling, or all the CAD work needed to create 3D printer models.
The clay modeling starts with a wire frame.
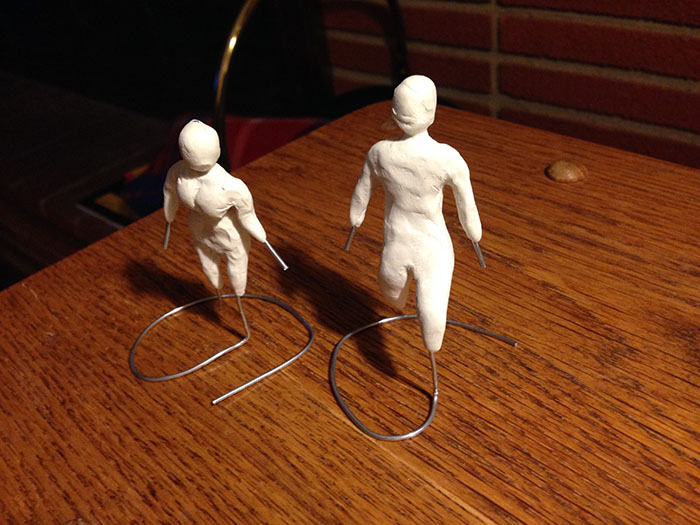
The first "coating" of clay is to put a body frame on the wire. Then this is baked to harden it, and then the finishing pieces to add the final form and texture are added.
There is plenty of room for improvement and a few things I would do differently if I were starting over, but I can live with this as my first attempt at clay modeling at this tiny scale. I have done clay modeling of larger figures with good results. The size of these characters makes it a real challenge.
The final view first pictured above was taken in indoor winter storage. As of this writing, I'm waiting to get outdoors and get to work on the layout. It's mid-March and still some snow around. The Covid-19 isolation is driving everybody a little crazy including me, so I'm eager to get out and do the one thing the government hasn't banned yet: Work on my layout!