Scratch Building a Stone Building
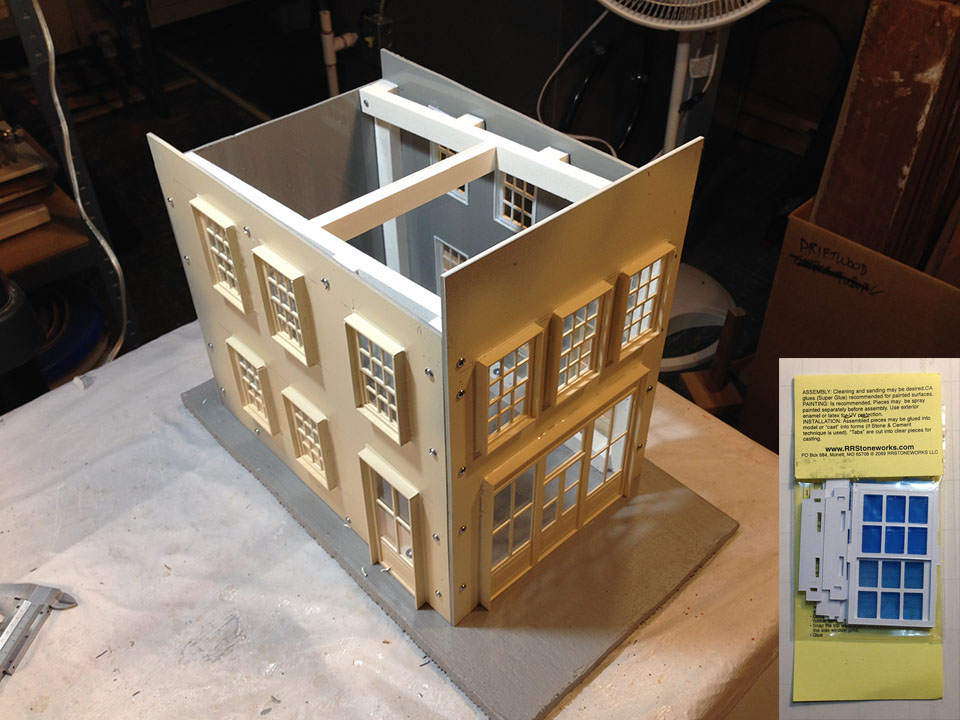
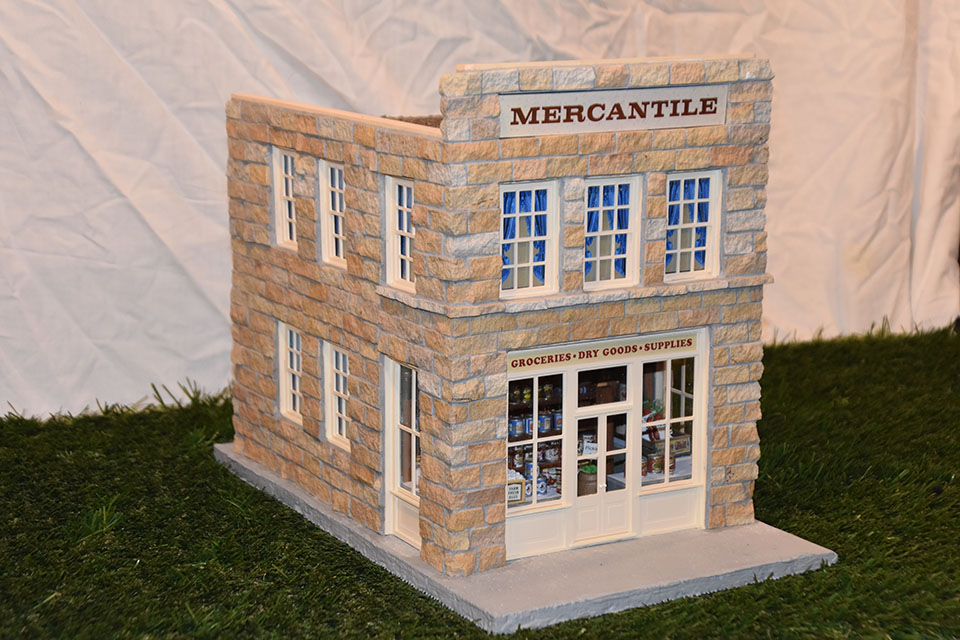
The recessed windows are made specifically for masonry and come with tabs protruding from the sides to allow them to be embedded into the block as the building is built. That would work great if the stones were all perfectly uniform. But the rougher stone I was about to build with were not uniform in depth. I was also uncertain about strength when finished. So I resolved both concerns by building a shell first, using 1/8" ABS sheet stock and a PVC board frame, anchored to a piece of water proofed cement board. I removed the tabs from the windows (which come as a kit themselves - photo inset), and glued the windows in place. I assembled only the frames, leaving out window panes, and then spray painted all of them at once. Panes were then added later.
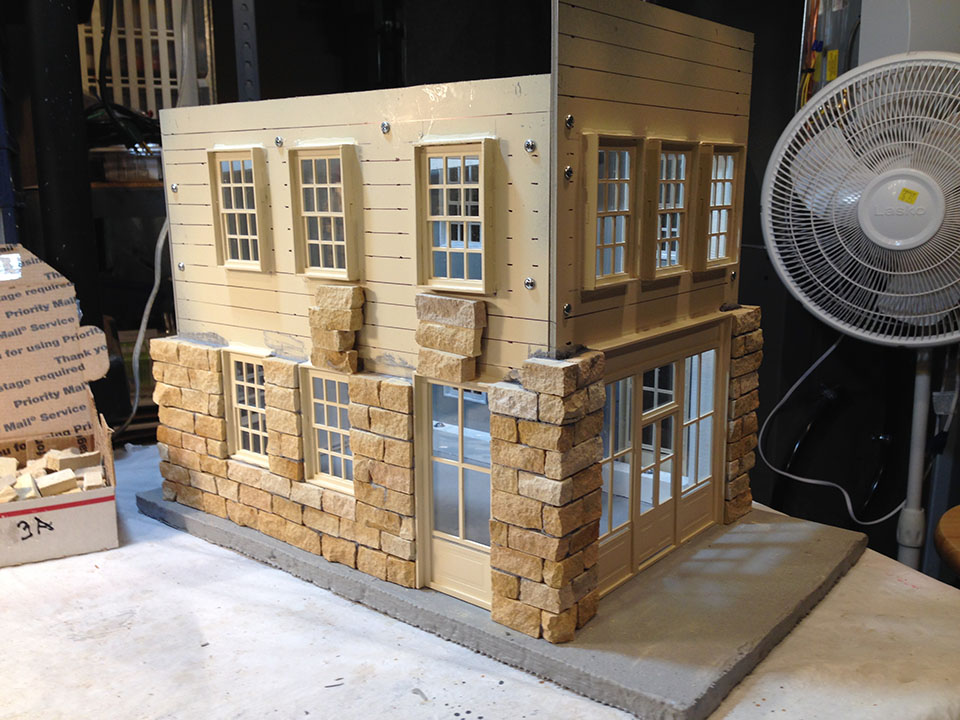
The stone was of inconsistent depth - I would remedy that in placement allowing total wall thickness equal to the thickest stone, and filling mortar behind thinner stone. The height was somewhat irregular, so I started by sorting them. I would lay one full course with stone of equal height, but there was nothing wrong with courses varying from one to the next. Length was also irregular, so making a course come out even on the end made every course somewhat of a jigsaw puzzle. I spent more time selecting stones for a course than I did actually mortaring the course. I mixed mortar only tiny bits at a time and used tiny tools to work it.
Aside from all of the other aspects of this being a puzzle, the other thing that took planning was selecting the right combination of stone to evenly fill between windows. I drew lines on the building to give me a visual guide for alignment. The irregular sizes of the stone meant courses did not necessarily fall on my guide lines, but the lines still gave me a visual indication of whether the course was somewhat level.
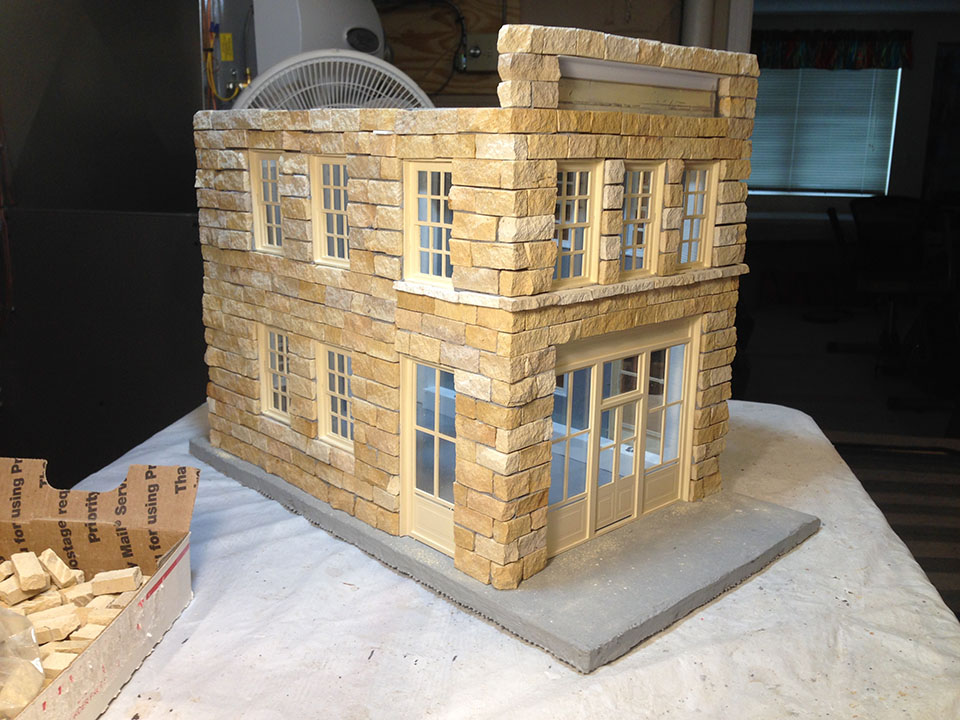
As long as the stone stayed in place, I did not concern myself with makeing sure the mortar fully filled the joints the first time around. The stone setting is complete in this photo, but still in need of final mortar fill. I used a cake frosting piping tool filled with mortar, functioning like a very fine tip caulking tool, to fill the joints.
The joints were finished with mortar fill, stone was washed, and then the entire exterior water proofed with acrylic stone sealer.
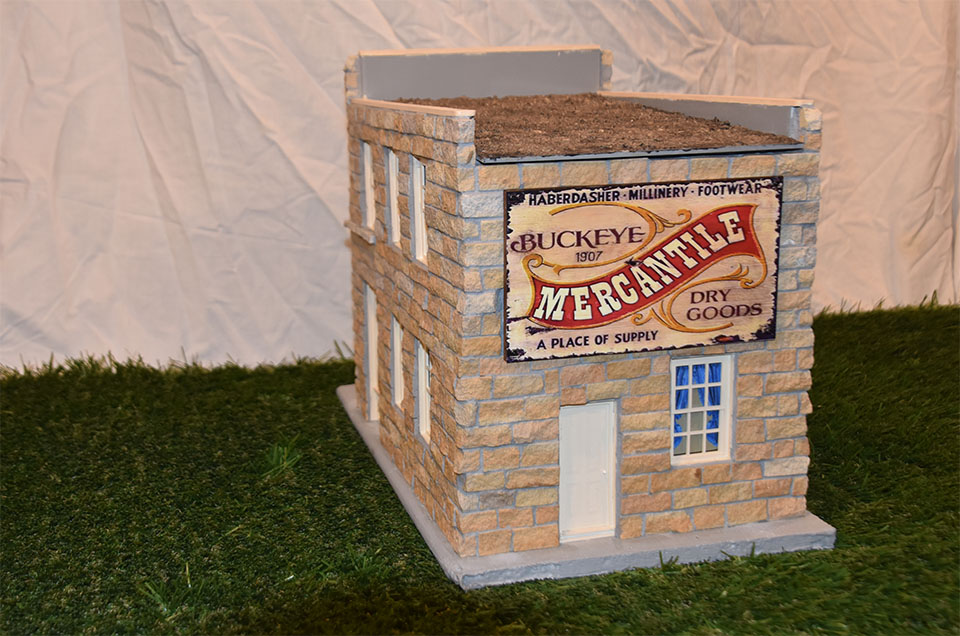
I found a photo of a vintage billboard on the internet, printed a copy of it, and laminated it to a piece of ABS sheet. The mercantile now has a billboard on the back of the building, seemingly a common practice with buildings of that era.
The other thing you can see from this angle is that the "flat" roof is not really flat - it is sloped to allow rain runoff. The roof is a 1/8" sheet of ABS. I applied a thick layer of acrylic medium, then sprinkled sand over it while the acrylic was still wet. After that was set, I sprayed a 50-50 mix of acrylic and water over the sand to seal it. The result replicates a "tar and gravel" roof commonly found on flat roof buildings. I haven't been able to find any historical record of tar and gravel dated to the 1920's-1930's but tar and felt roofs were invented in the mid-1800's.