![]()

The two figures in the middle are 3D printed. They were not printed with the highest print quality setting, and it sort of shows. But from a distance, they will fit in with the other manufactured characters. Detail is less than outstanding on all but the most expensive G scale diorama characters.
I have long thought that a 3D printer would be an awesome tool for a model railroader. I have seen numerous blog postings from others who have used 3D printers for their hobby. This idea isn’t new or all that radical. But it has not always been anywhere close to affordable.
When 3D printers first came out, you could buy a small brand new car for less money. I recall more recently when there was a lot of buzz about the “first ever 3D printer for under $1,000”. Nice. Keep working on it.
It was fall of 2018 when Amazon went on a big promotional kick offering a 3D printer called the da Vinci Jr. for a sale price of $199.99. At that point, I couldn’t resist. I knew I would not be getting the most state of the art, highest quality printer. But for my purposes, it was probably going to be just fine.
I had no 3D CAD experience, or any mechanical CAD experience for that matter. Buying the printer was only the first of several hurdles. Learning how to make stuff would be probably the biggest hurdle. Finding affordable CAD software to go with the affordable printer turns out to be another challenge. So I am sharing my discoveries to date in hopes of helping anyone who might be contemplating going down a similar path.
There are 3 areas of subject matter I am interested in “printing”: (1) Parts for locomotives and rolling stock; (2) Parts for buildings such as unique window frames, doors, etc; (3) People.
Printing people was really at the top of my list. My layout theme is early 1900’s. There are lots of G scale people for diorama set in the 1950’s and later, but diorama for 1880 to 1930 (steam era) is harder to come by. So I figured start making them myself would have to be an option. I still haven’t ruled out modeling G scale people with polymer clay - I have sculpted people in something closer to doll house scale (1:12). Modeling at 1:22 or 1:24 would be a little more trying, but I’ve got books proving at least somebody has done it if not me yet.
In my preliminary research on 3D printing, I did discover that there are a lot of pre-made scale model figures out there ranging in price from free to cheap to are-you-kidding? There are literally thousands of models available. Unfortunately (from my perspective anyway) the vast majority are cartoon or game action figures. I had to really hunt to find just a few usable in a 1900’s railroad layout.
Printing a pre-made model is sort of like printing a picture on a 2D printer. If you want to print a picture, you download the file, typically a JPEG file (.jpg), and tell your computer to print it on paper with ink or toner. It’s really pretty much the same with 3D. You download a stereo lithography (.stl) file, and tell your computer to print it - just with a different printer. The “ink” in a 3D printer looks more like a spool of weed whip string. If you didn’t know it was for a 3D printer, you would most likely assume it was in fact for my weed whip.
There are a few different technologies in use for 3D printing, but the less expensive “you can do this at home” variety amounts to a very precise, computer controlled, hot glue gun. The extruder heats up to about 400 degrees (F), and the filament that looks like weed whip string is pushed through the nozzle where a very fine (0.4 mm) line of hot plastic is deposited. Now move the end of that extruder around the platform very precisely while pushing out more melted plastic, and pretty soon a shape starts to appear. The fine tip of the extruder has 3 axis of motion. The mechanical layout may vary from one printer to another, but the da Vinci Jr. works this way: Two axis of motion are managed by the extruder moving left and right, up and down. The third axis is the platform moving forward and backward. Including the filament feeder, there are a total of 4 stepper motors or servos. It sounds exciting, but watching it print is actually rather un-exciting. It is a slow process. Building a G scale diorama figure (e.g. man standing, about 3” high) takes 2 to 3 hours.
The da Vinci Jr gets mixed reviews online, but I have had no trouble with mine so far, other than learning to use it. The XYZ Printing software that comes with it is necessary for printing. It opens STL files, “slices” the object for printing, and sends the job to the printer. The da Vinci Jr supposedly comes with CAD software, but I’ve never gotten that to work, or even run on my PC (tried it on everything from Windows 7 to Windows 10). But I found plenty of other, probably better, alternatives for CAD software. I only use the XYZ Printing software as a printer driver.
It didn’t take me too long to figure out that the only type of file you can send directly to the printer is an STL file. So I went looking online for characters in STL format. I found this guy “Comstock” on one of the free sites. Importing him into Fustion360, he looks like this:
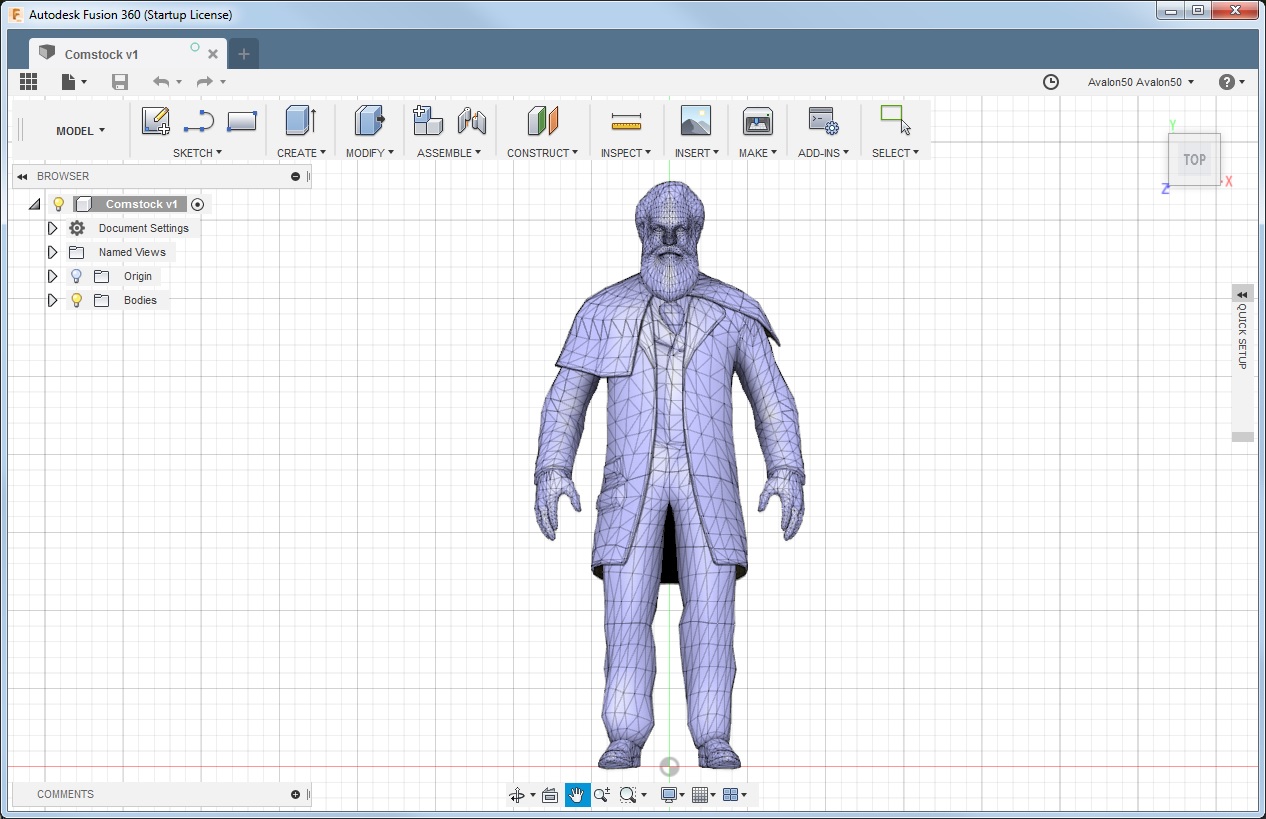
Zooming in a bit to look at the detail, you see this:
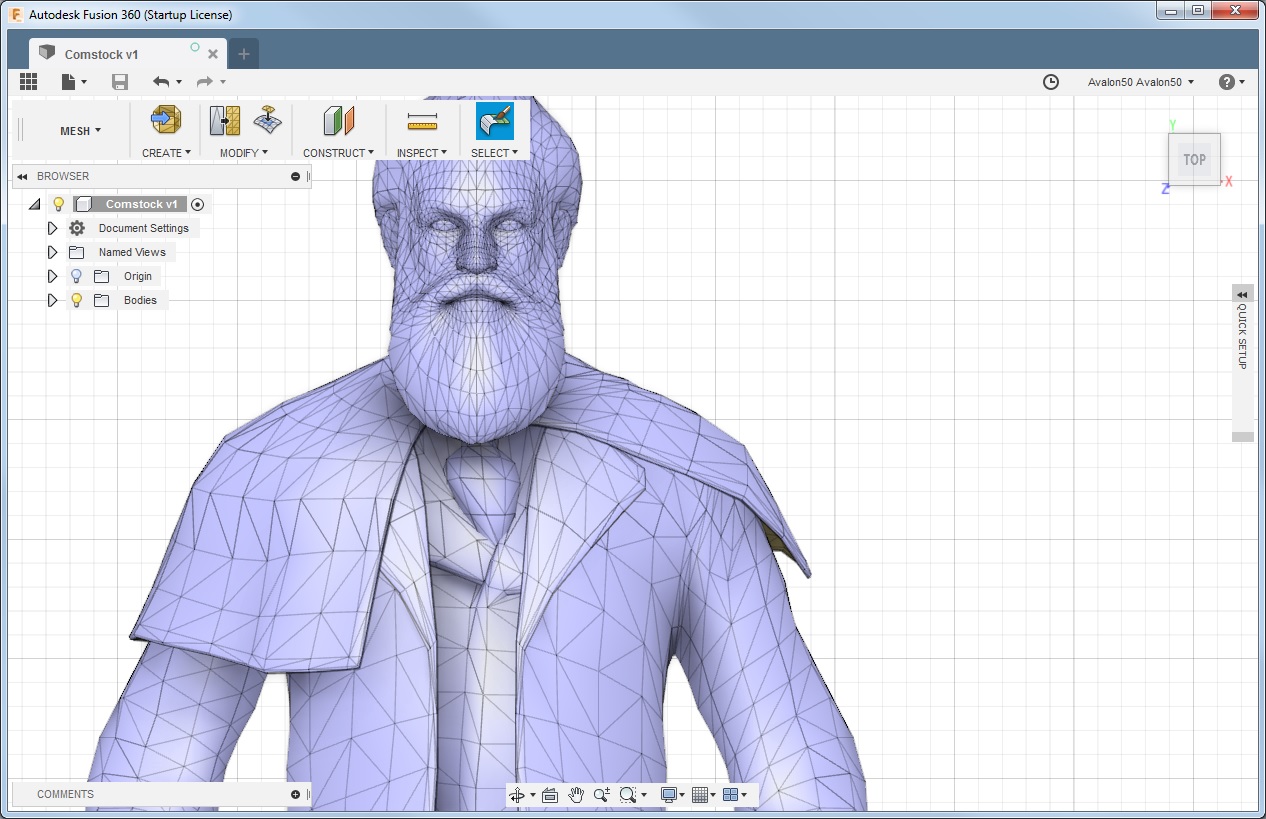
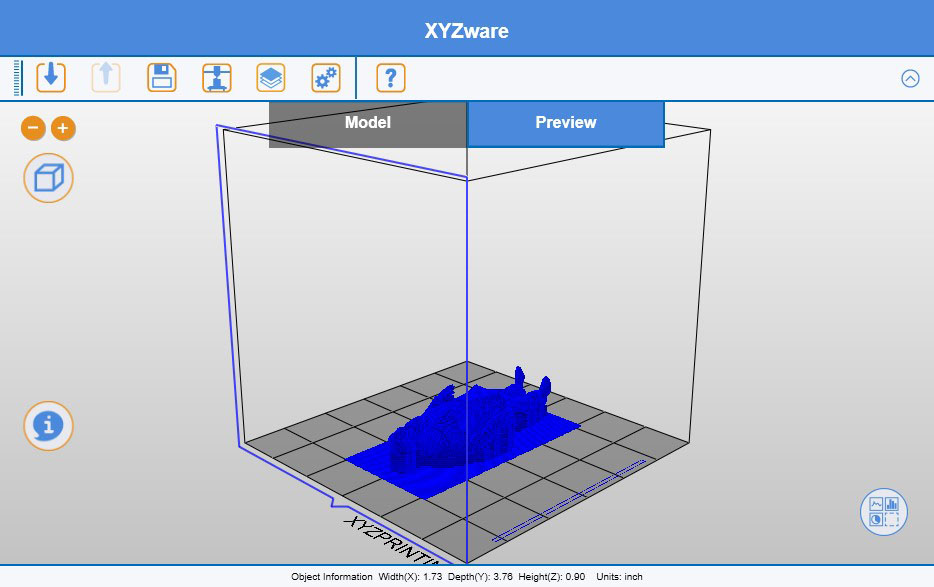
The complexity of this model was within the limits of the XYZ Printing software, so I opened this STL file to get ready for printing. The image appears as a diagram showing roughly how it will end up in the actual printer.
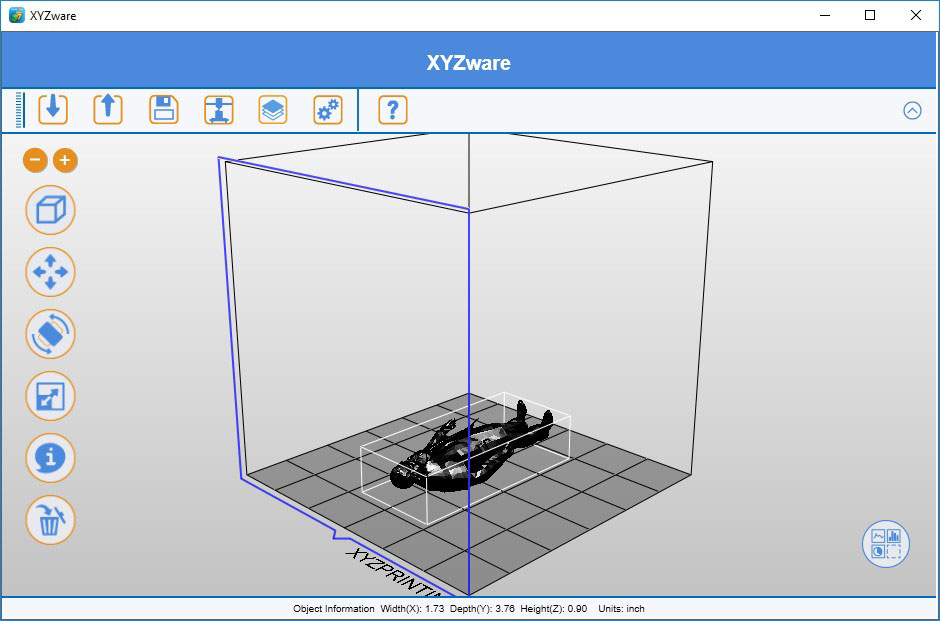
The icons on the left of the screen are available for manipulating the image prior to printing, and one thing I did was adjust the scaling to make my guy just over 3 inches tall when done.
When you click the print icon (4th icon from left in top for), you have the option if selecting a raft and supports. Unless you are printing a solid box, you need these so that arms and limbs have something to rest on while being created. It does not work well to try to print into mid-air. The plastic you are extruding needs something else to stick to or it won’t stay put.
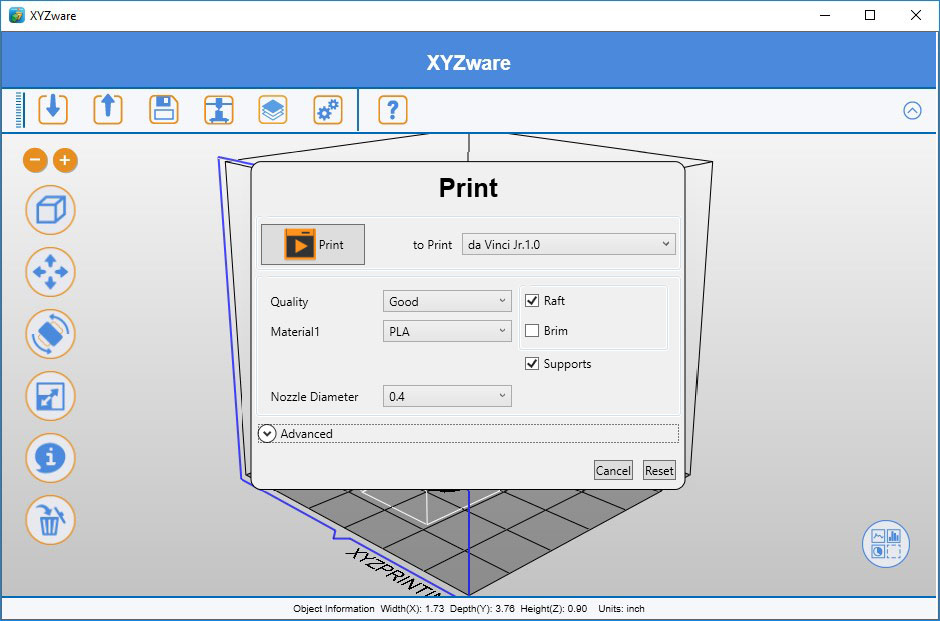
After selecting raft and supports, the image will now appear on the screen with those added.
And now the printer goes to work and keeps busy for the next 2 hours if printing Comstock with “good” quality, or closer to 3 hours for “excellent” quality.
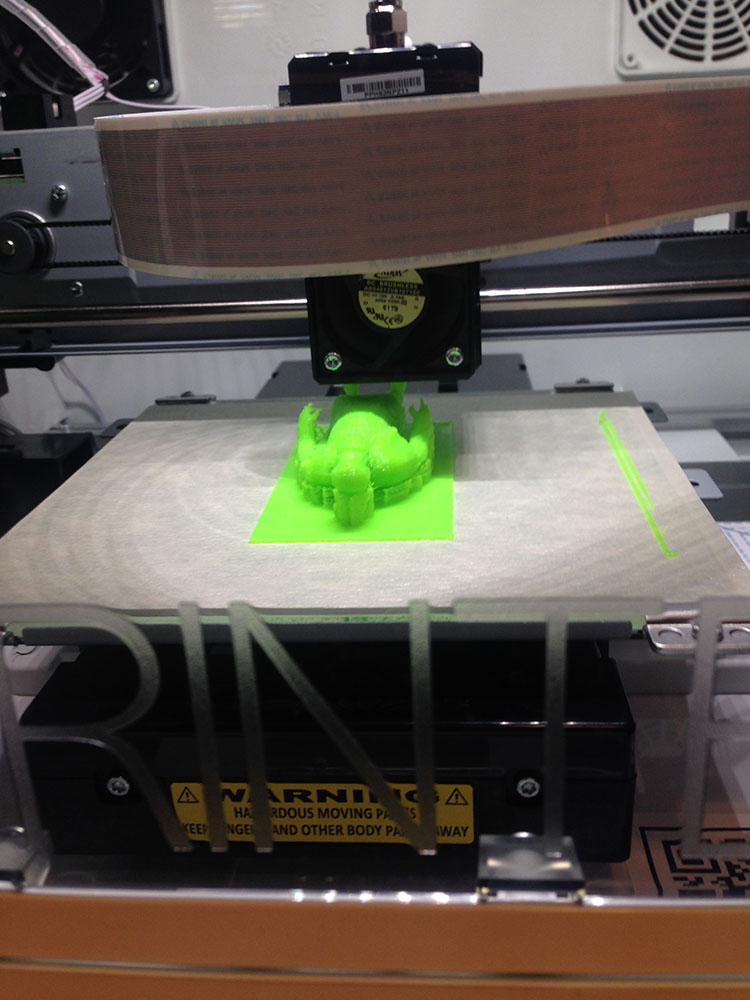
The printer came with a spool of neon green filament, so I did my first few trial prints with that. It is perfectly functional, but will require at least 2 coats of paint to end up with something usable.
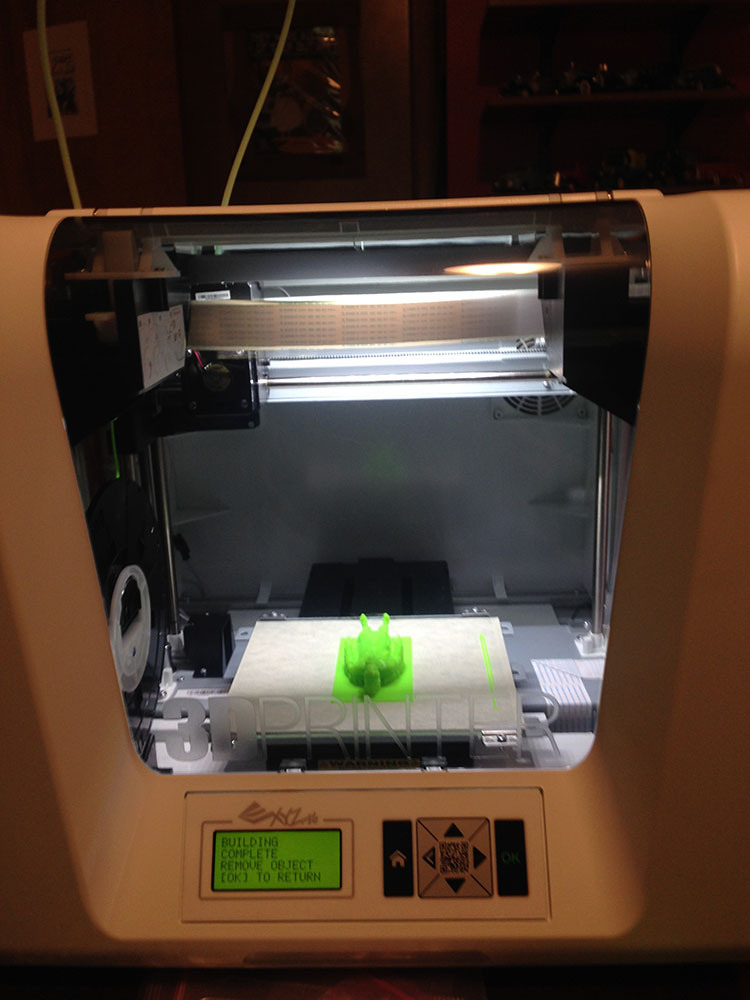
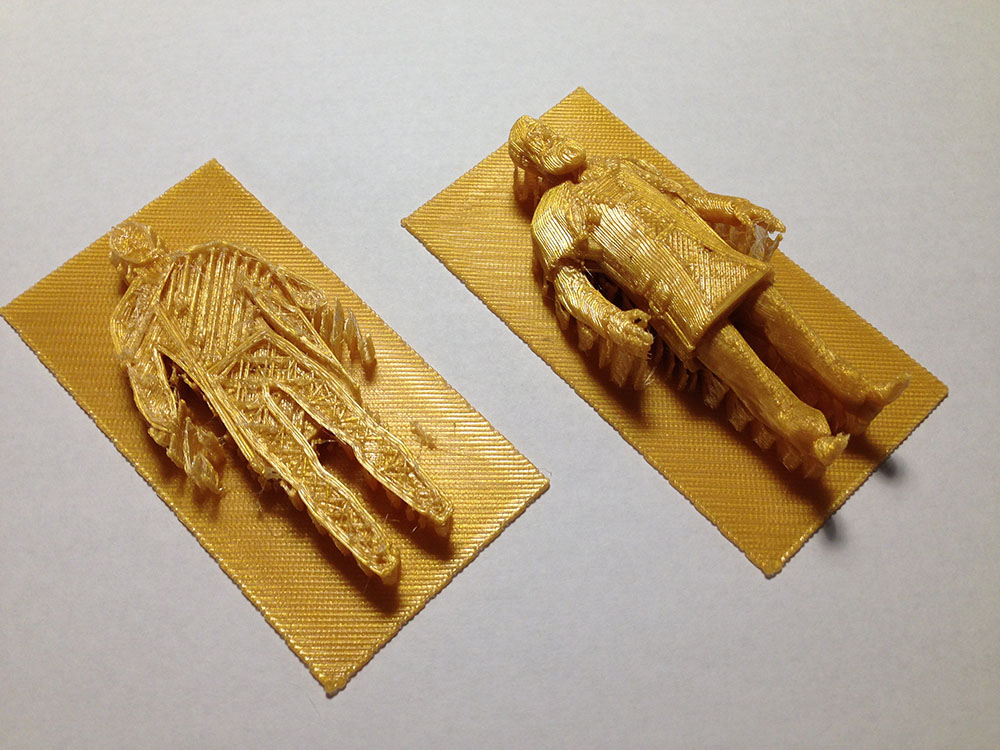
When all done, the character looks like the above shot while still in the printer. Upon removing him from the platform, you see something more like the following, when printed with different color filament.
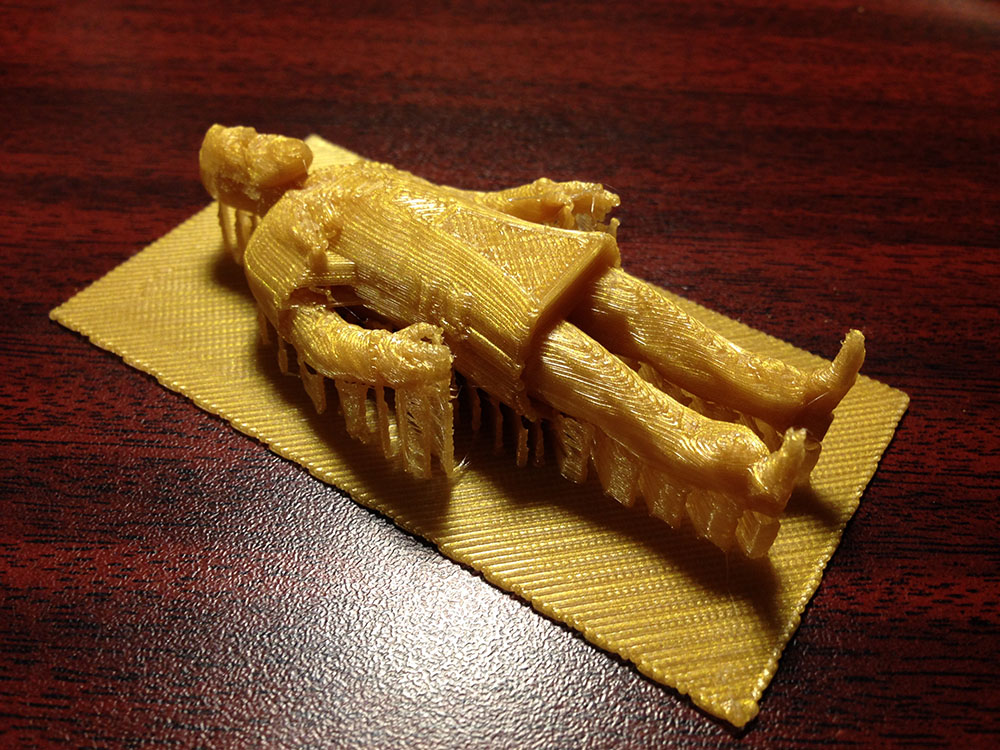
Due to some kind of screw-up, one of my attempts to print Comstock aborted about halfway through. Not sure what went wrong, but the half-finished character was something worth saving just to view what is really printed inside a solid character. It isn’t solid at all, it is a collection of ribs.
I mentioned printing with “good” versus “excellent” quality selected in the XYZ Printing software. here is a side by side comparison. You see “good” on the left, and “excellent” on the right. You can see the difference especially in the facial detail.
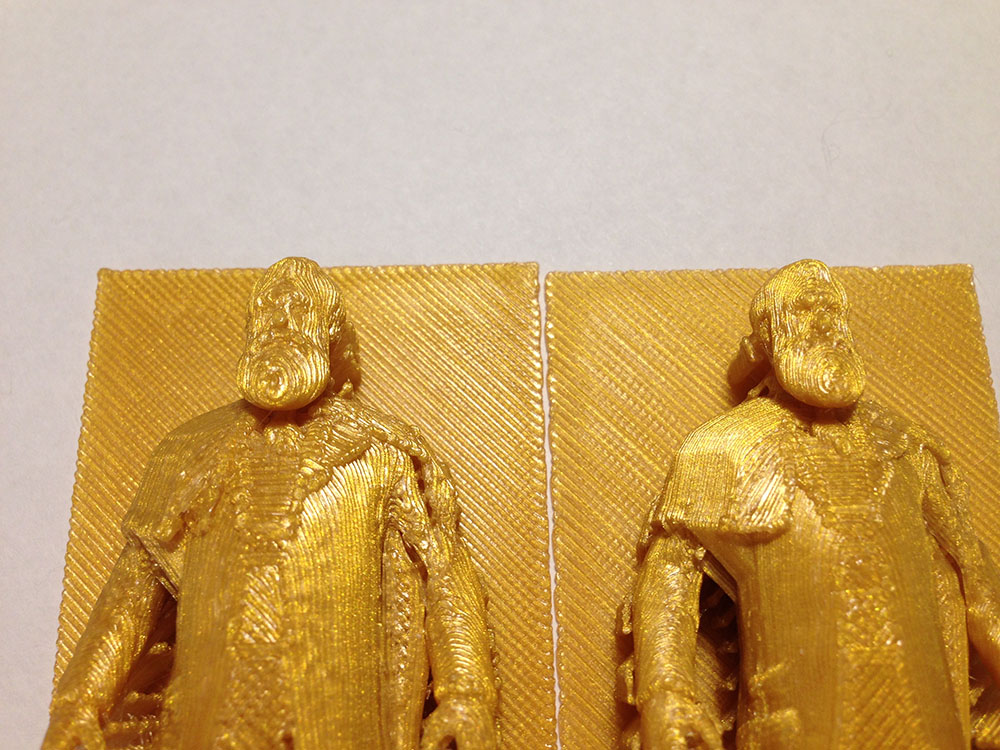
There are going to be more expensive 3D printers out there that will do an even better job than this. But for creating diorama that nobody is ever going to look at super close anyway, this is going to be good enough and fits in my budget.
After painting the characters, they end up looking like the first photo posted at the beginning of this article. These were printed in only “good” quality. There are a couple of things I could do to improve on that: (1) Start by printing with “excellent” quality; (2) Play games with primers and fillers to smooth the surface before final coat of paint.
Some models are available already converted to STL format. But many are not because STL is not a format that one uses when originally creating the design. It turns out there are quite a few 3D design file formats. I went looking for CAD software that was capable of converting file formats. I had not yet found out how to get “free” access to Fusion360, so went looking for software that was at least inexpensive. I found 3D Crafter from Amabilis Software (amabilis.com). They have a free version of their CAD software, but the free version does not export to STL file format. The “Pro” version that does export STL is at least affordable - only $40 available online.
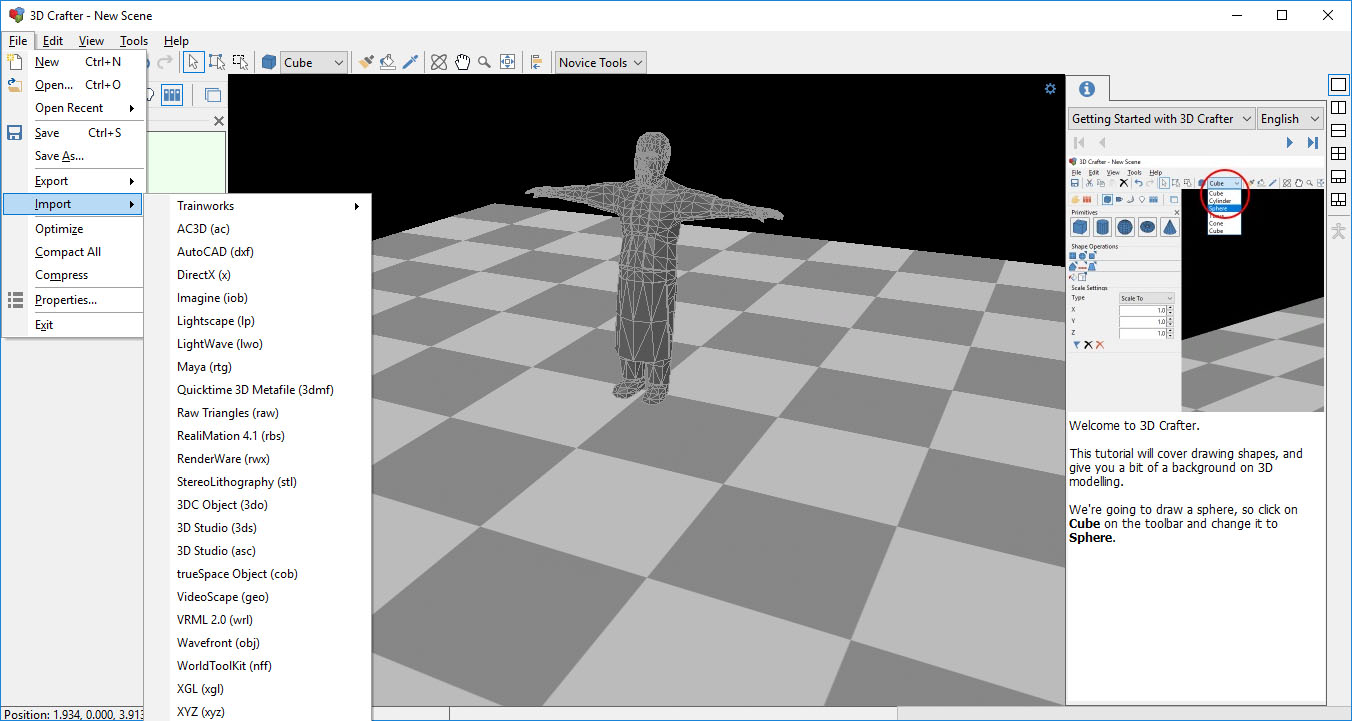
You could certainly use 3D Crafter to do original design. I have ended up using it primarily to convert file formats. I have now found that Fustion360 is able to import other file formats, and I can export STL from Fusion360. I probably would not have needed 3D Crafter - this was simply a step in my learning process.
The one thing I find about most existing characters is that their arms are straight out like this guy. I need to figure out how to move their arms around in the software, but haven’t quite gotten to that point yet.
It seems that male characters are more readily available as G scale diorama. Finding female characters, especially looking like they belong in early 1900’s, is a challenge. I went looking for female characters, and found very few. One in particular was dubbed “big girl” - seemed obvious when I loaded up the model.
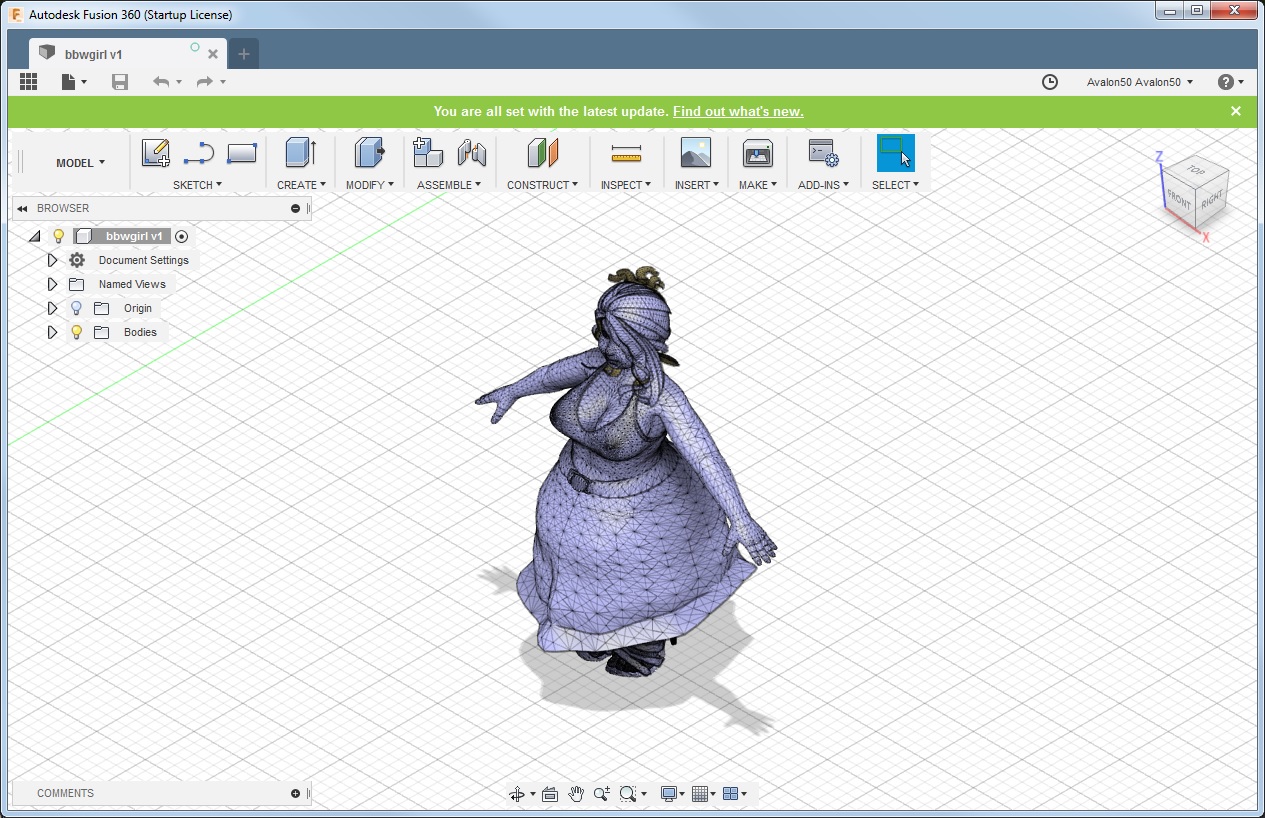
This model was not in a ready-to-print format. I initially used 3D Crafter to import and then export as STL. When I tried to print, it failed. I eventually figured out the XYZ Printing print driver has a capacity limit and this model exceeded that limit, whatever it was (it isn’t really published).
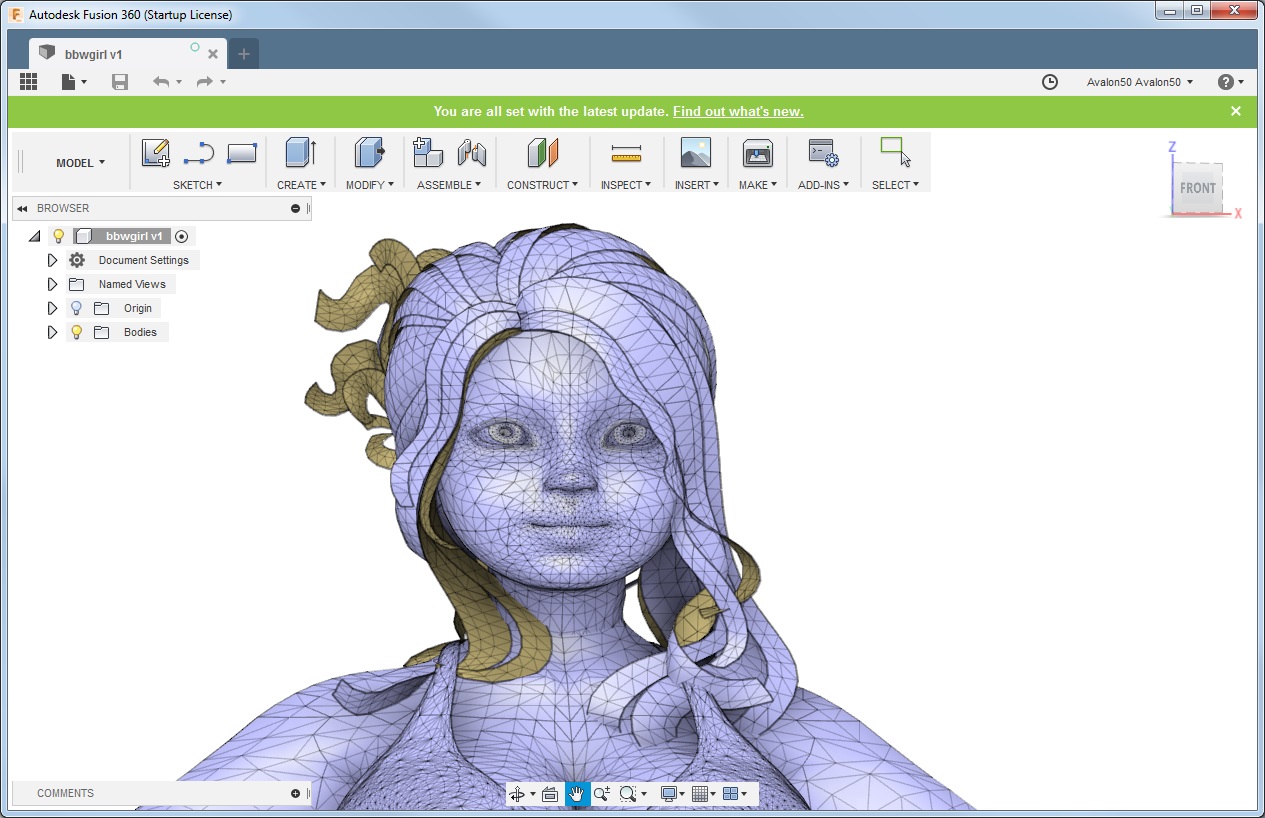
Zooming in, you can start to see the complexity of this model. Every one of those points where lines intersect is a data point that the software needs to keep track of.
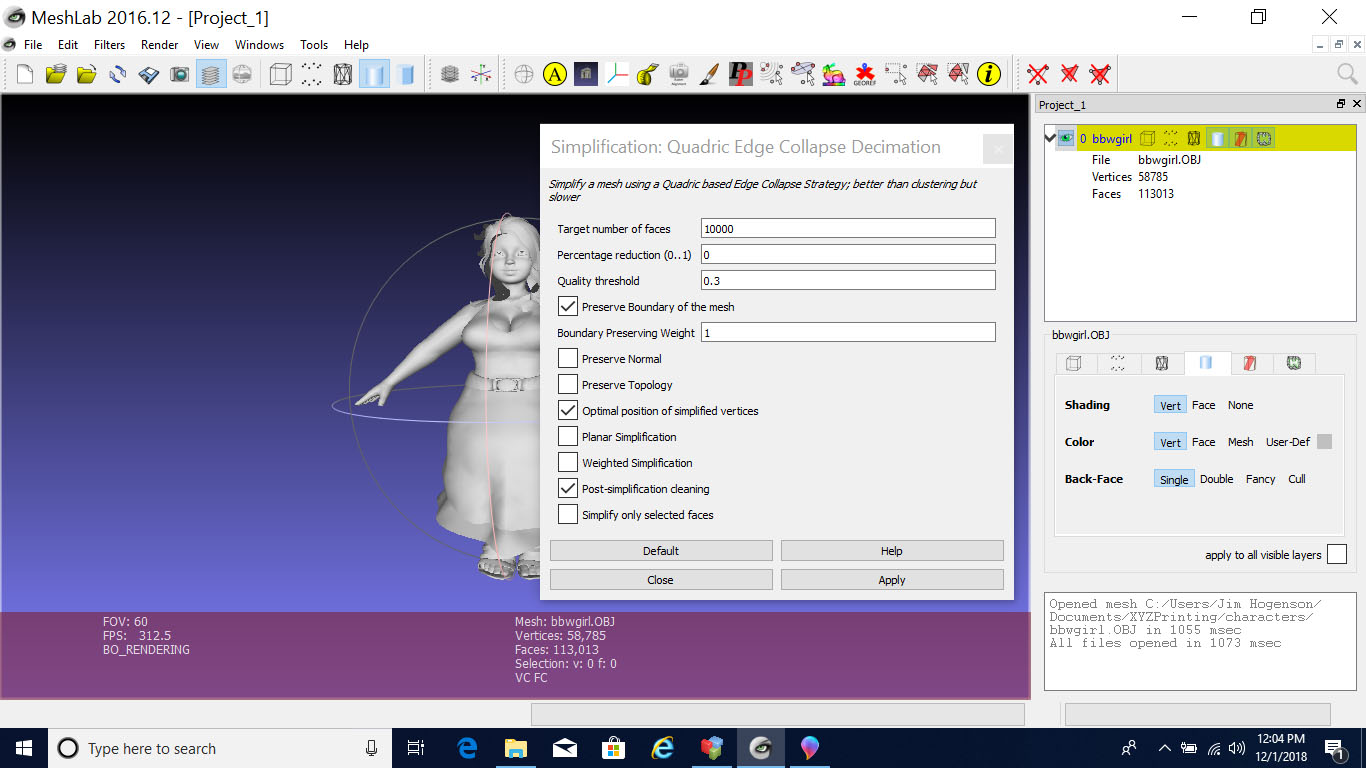
I found a free software tool called MeshLab. Its purpose is to reduce the complexity of the mesh representing a model. After reducing the complexity by about 50%, the XYZ Printing software was able to open the STL file and I was able to print this model.
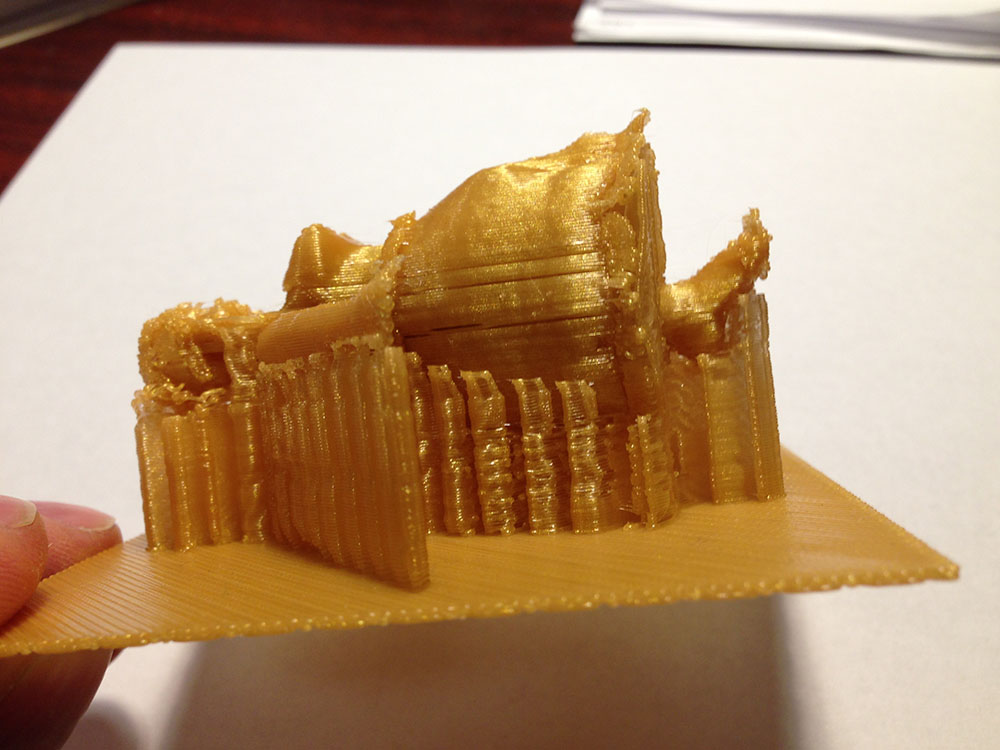
The quality suffered from two factors: I printed it in only “good” quality, and the mesh reduction does not understand quality of facial features - it just reduces the mesh complexity generally by smoothing things out, but with some adjustments to highlight certain features so as to not lose them. Ok, it tries, but success is marginal. Moral of this story: Try to stick to simpler characters to begin with.
Here is the finished product. The other thing worth noting here is that if you have a character with a large round base, by the time you get to the top, the supports end up using up a lot of plastic that’s going to become scrap. Oh, and speaking of that plastic, the da Vinci Jr uses PLA, which is plant based plastic. It is advertised as biodegradable, and good for the environment. Right away, I’m thinking “oops, I don’t want my layout biodegrading”. Not to worry. The term “biodegradable” is a relative term. Normal plastic takes millions of years. PLA only takes a thousand. I’ll be safe. I’ll also be unimpressed with the biodegradable claim implying this type of plastic is ok for the environment. This stuff should still not end up in the ocean.
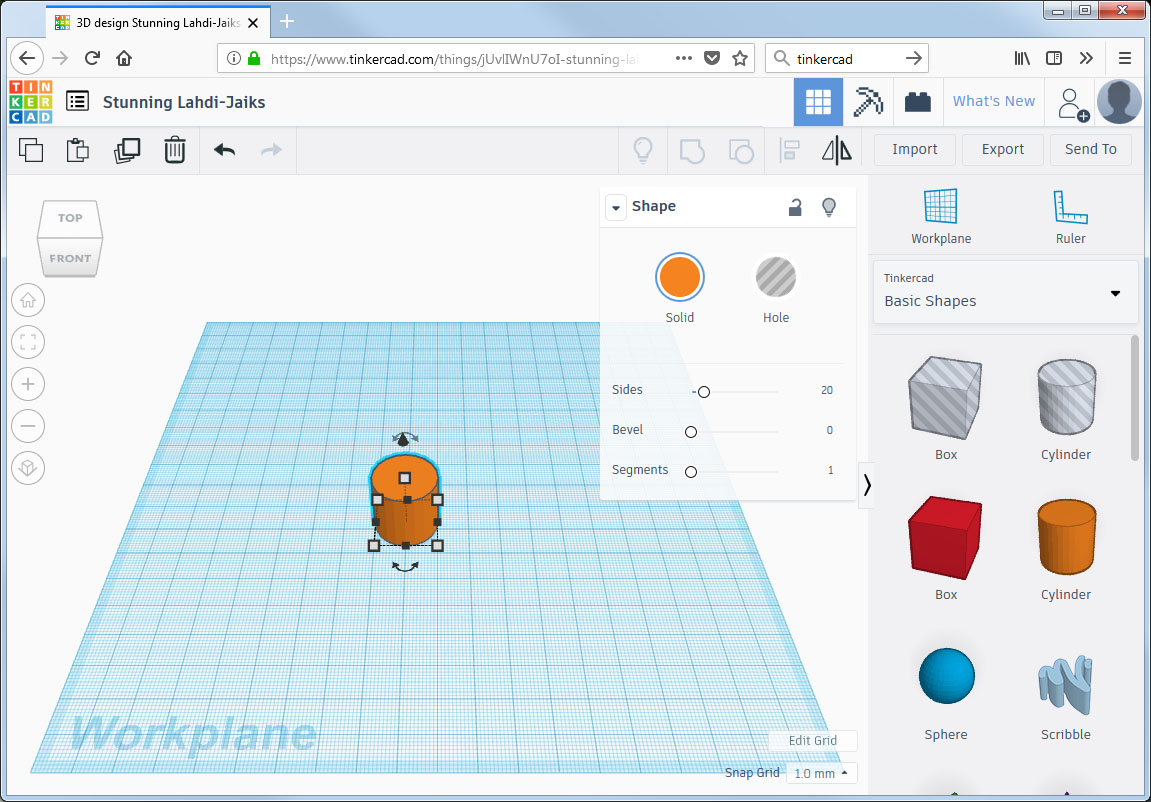
The first couple of CAD programs I looked at were a bit overwhelming. I eventually stumbled upon Tinkercad.com. As quoted from their web site: “Tinkercad is a free, easy-to-use app for 3D design, electronics, and coding. It's used by teachers, kids, hobbyists, and designers to imagine, design, and make anything!” I highly recommend starting at Tinkercad.com if you have no prior CAD experience and want to try your hand at it. The tutorials walk you through creating your first few simple example projects, and it is entirely web based - nothing to install on your computer.
I sort of muddled through some Tinkercad tutorials, but was still not quite getting it. I found some tutorials on YouTube that seemed helpful. They were using Fusion360. I went looking for Fusion360 - turns out to be another Autodesk product (Tinkercad is from Autodesk, too). At first, it seemed Fusion360 was going to be expensive, but I found the less than obvious claim that it is free to hobbyists and students. So I downloaded Fusion360, installed it, and registered as a hobbyist. Fusion360 is used by serious professionals in manufacturing and industry, but is easy enough for hobbyists.
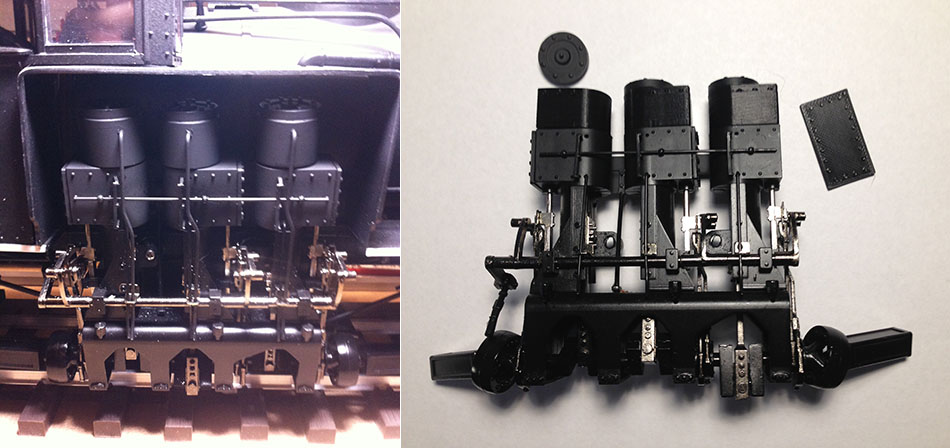
I had no visions of grandeur thinking I would create people right off the bat. But I was hoping to be successful in creating some far simpler pieces for my 4-truck Shay. When converting my Shay to a 4-truck prototype, one of the things I realized I needed to do was create bigger cylinders. Using only stock plastic, I put together my best representation of bigger cylinders, but they were not prototypical. To have at least a better resemblance of something prototypical, I was going to have to 3D print something.
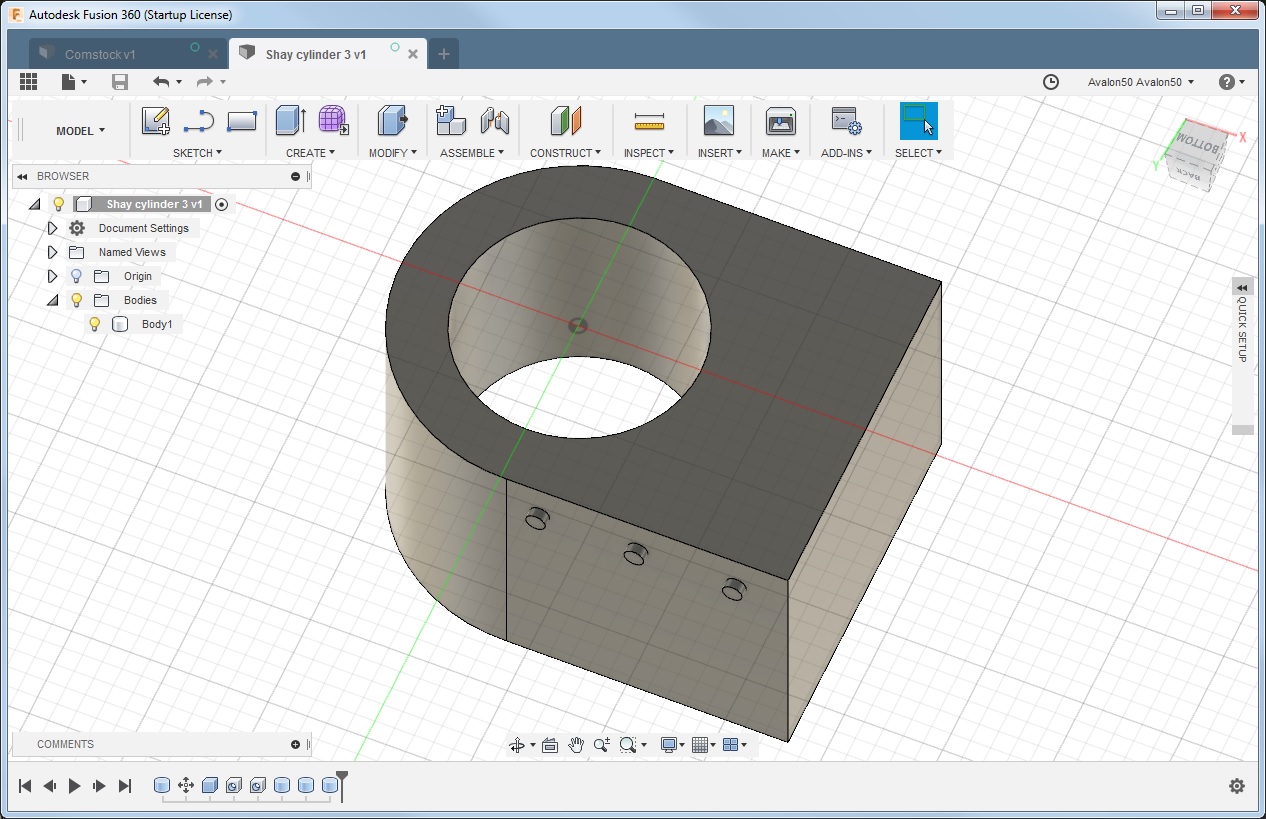
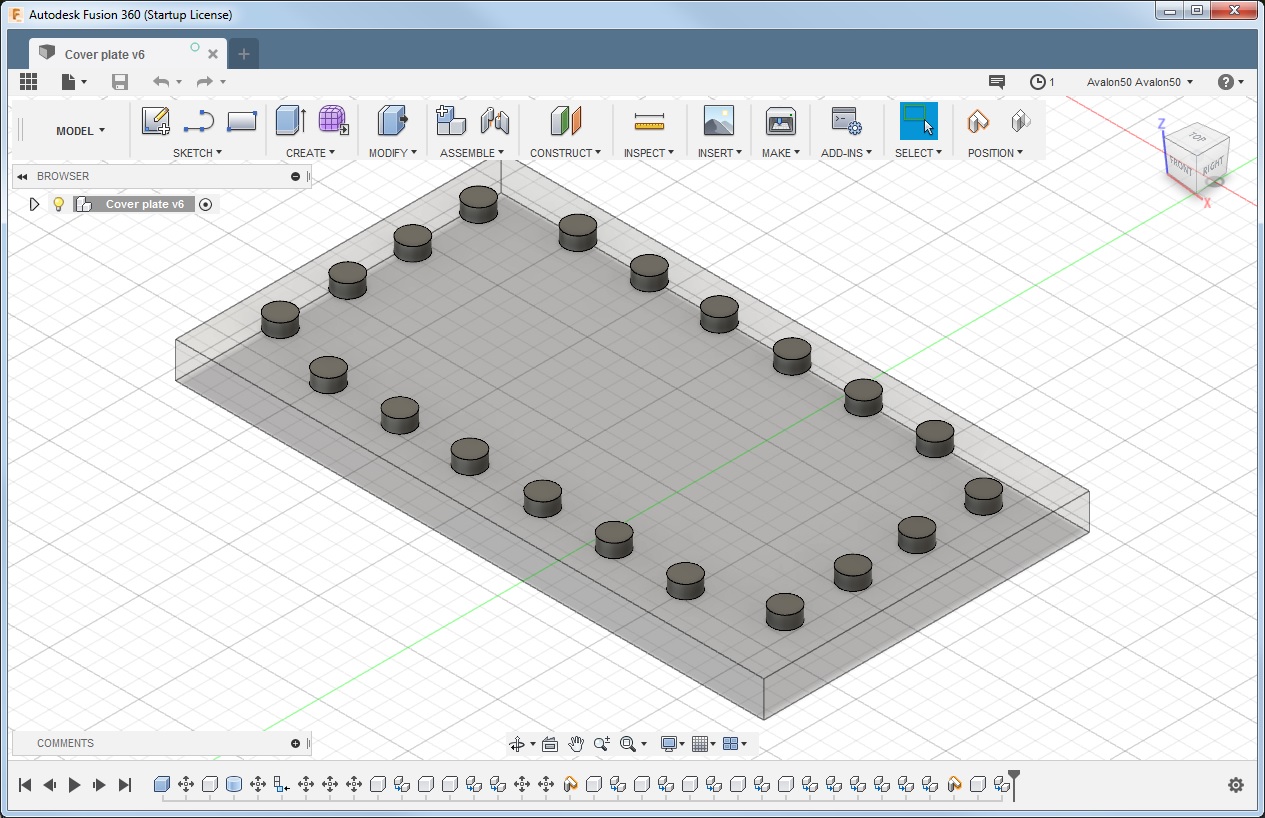
I was originally going to just replace the cylinders, but upon closer inspection, I found that they had structural significance internally. So I went with a cylinder “extension” instead, and a new plate for the side. You can see I cheated on the bolt design - round instead of hexagon. You can barely make out that detail on the original model anyway, so I'm not expecting a flood of criticism. You're just not going to be able to pick out that level of detail while the train is moving, and my 4-truck Shay does not just sit around.
After building these models and exporting as STL files, I sent them to the printer. This time I loaded the printer with black filament since black the right color for locomotive parts. The resulting parts look like this:
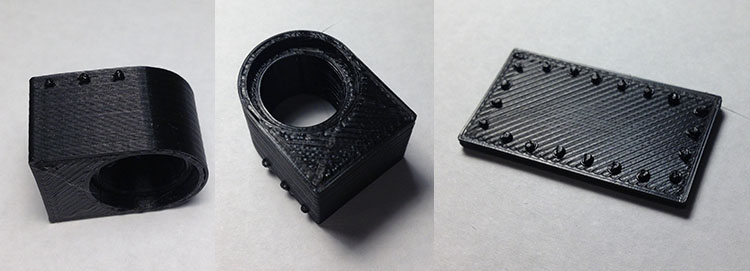
The Shay cylinders are pictured below. On the left is my first attempt at bigger cylinders using only stock plastic pieces. The photo on the right shows the newly printed parts. I plan on painting the new parts with black primer, then sanding smooth, for better appearance. These cylinders are much closer to prototypical, based on what I've seen in a collection of old photographs of Shays of all sizes.
I haven’t done any window frames or doors yet. But I can tell you that in the past, my building designs would be based around available G scale window kits, and design options limited accordingly. (I didn’t have the patience to scratch build window frames.) I am now totally free to create whatever windows and doors I want. As long as I keep the parts to 6 inches or less, they will fit in my printer. Scaling up from G scale, a 6 inch model would represent a window 12 feet wide. That’s not realistic, so anything that is realistic is easily going to fit.
I found out about another CAD package called "Make Human" (http://www.makehumancommunity.org/). I downloaded a copy (it's free), and it took relatively little time to start playing.
I got off to a little bit of a slow start by downloading the "stable" version 1.1.1, but was unable to get the "assets" to synchronize. I then downloaded the "development" version 1.2 and it worked much better. In addition to many poses of basic figures, there is a large collection of clothing items and other miscellaneous accessories to dress your figure in. There is still a bit of a shortage of late 1800's or early 1900's clothing, but the ease of working with characters in this CAD package will make the clothing issue much easier to tackle.
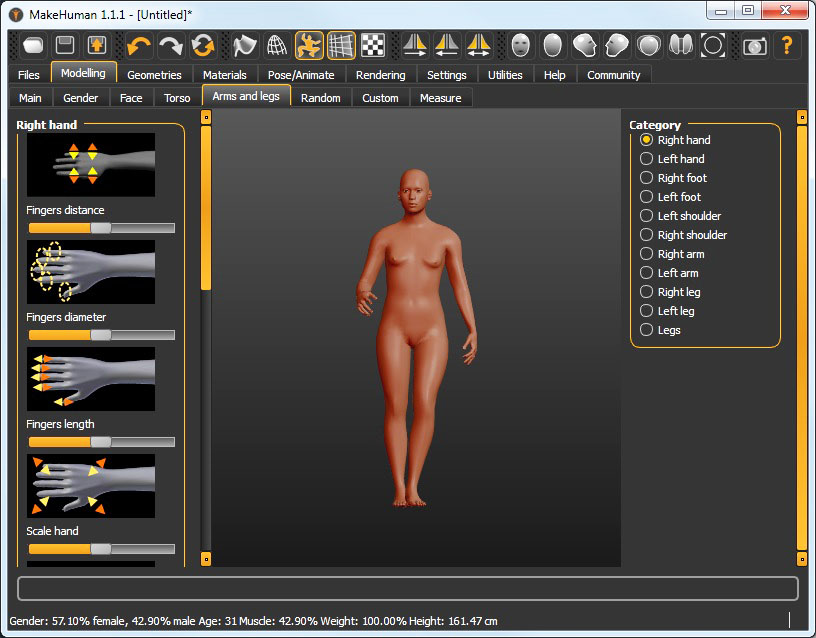
Everything in this CAD program is about adjusting the character. Here is a screen shot of the "tools" for modifying the fingers (as if that's going to be critical for my purposes... haha). You have the ability to adjust every part of anatomy. Yes, I mean every part. But I don't have to show you every part. You also have a range of facial expressions. Such detail will be lost at a distance on my railroad layout, but this CAD program is intended for a variety of artistic uses.
Putting clothing on the character is a bit more meaningful for my purpose.
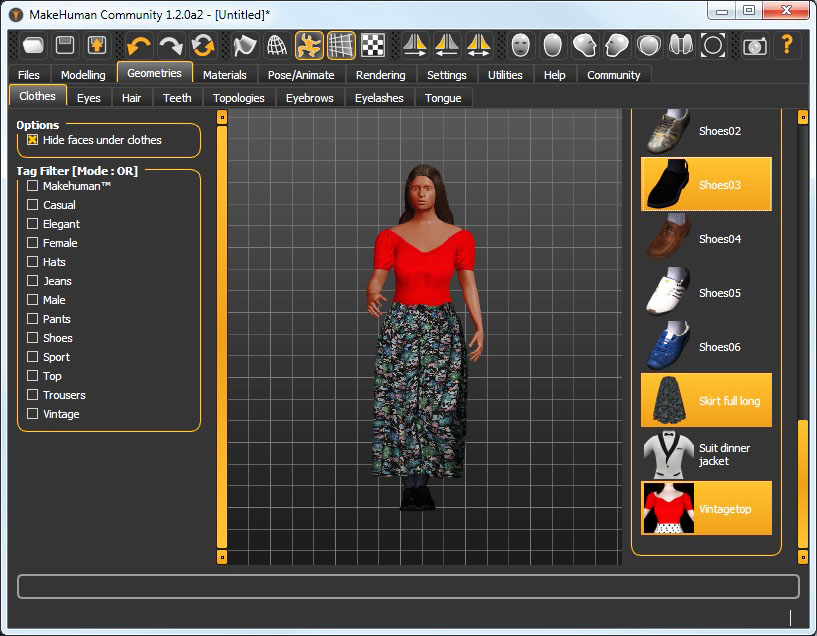
Here is just one more example of clothing options available.
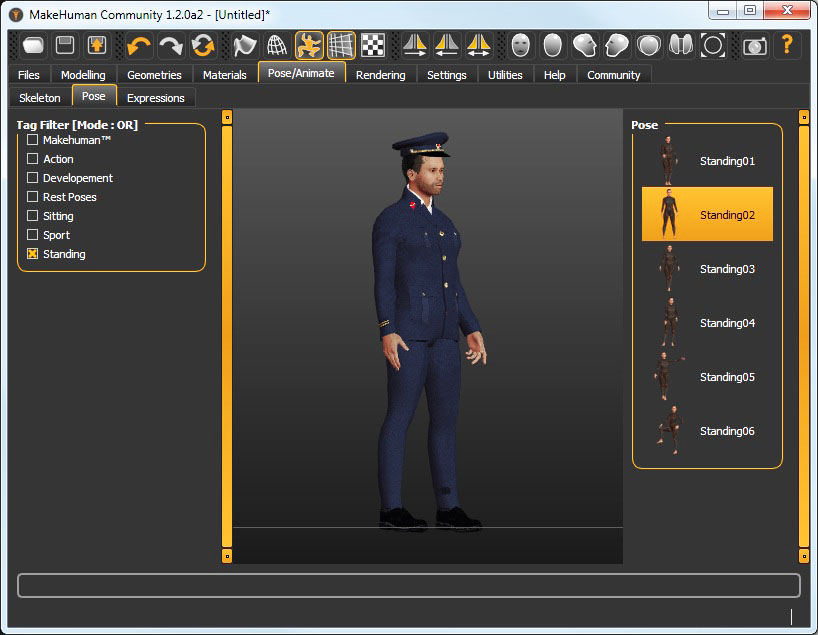
I mentioned poses. Just a couple of mouse clicks suddenly gets our conductor guy on his knees.
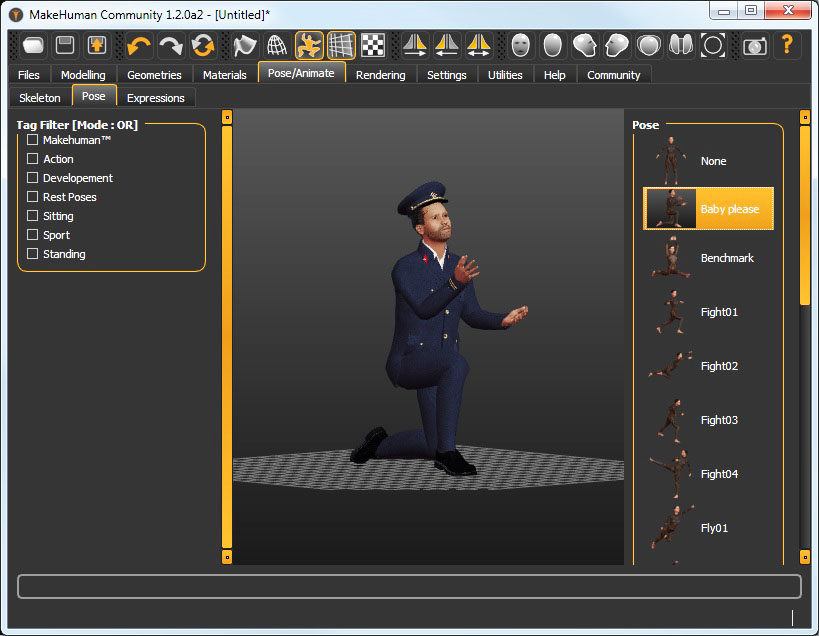
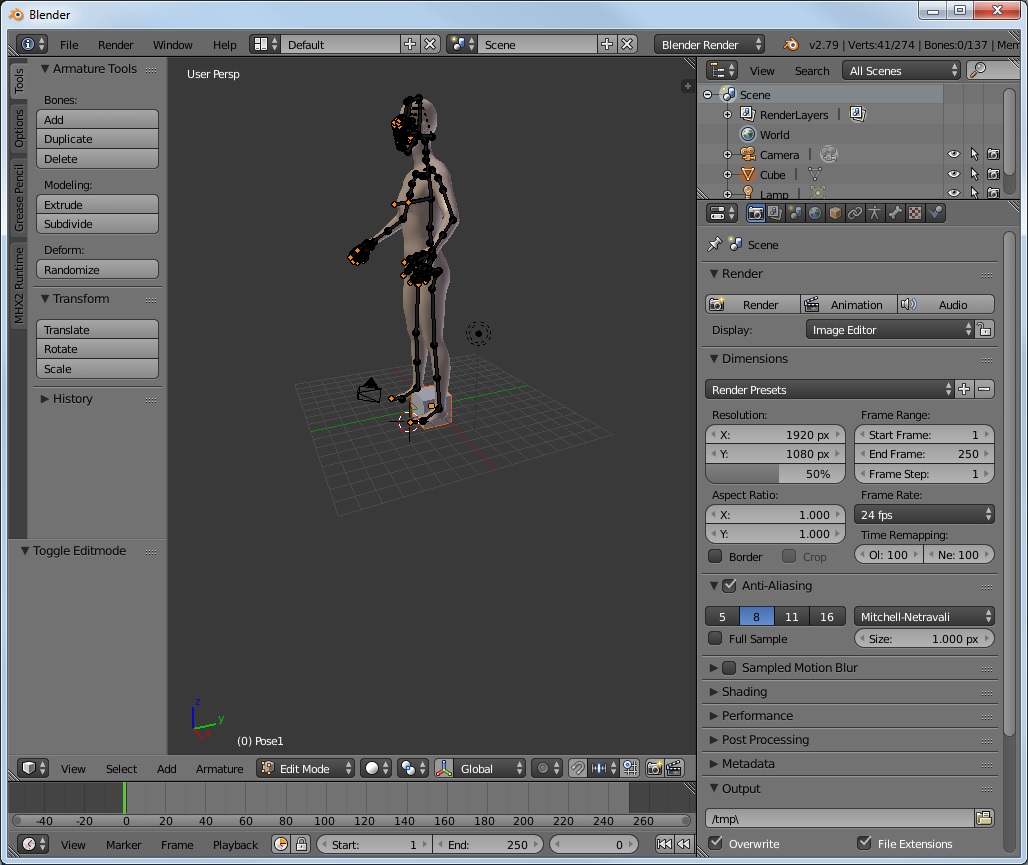
There are a bunch of poses already available. But if you want to edit the pose or create your own, you start by exporting the character in a specific file format, and then import that into Blender (another free community CAD program). Inside Blender, you move the basic skeleton around to adjust the pose. I got as far as importing my character into Blender. Now the hard part... learning how to use Blender.
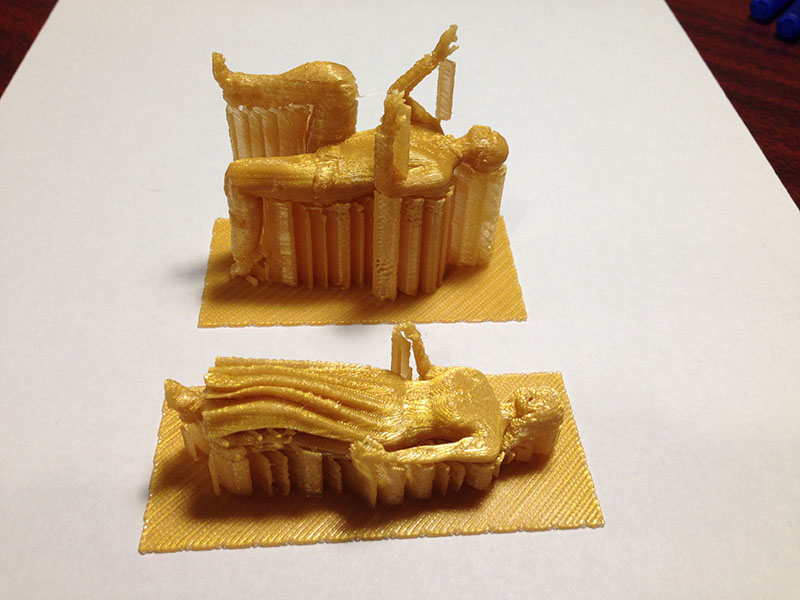
I changed the clothing on the guy kneeling, but here are both of the two characters pictured above printed on the da Vinci. I was pleasantly surpirised how relatively quickly I was able to create and print new characters with "Make Human". Now I just need to remove them from the support structure, touch up and paint.
This list is by no means comprehensive. In fact, it doesn’t even include all the things I looked at. This list is simply the list of things I found useful enough to want to come back.
Huge library of 3D models at: https://www.thingiverse.com/
Found characters including Comstock (noted earlier) here: https://www.thingiverse.com/thing:142616/apps/#apps
More content sites:
https://pinshape.com
https://cults3d.com
https://yeggi.com
https://turbosquid.com
Free online CAD - great starting point: https://www.tinkercad.com/
Fusion360, free for hobbyists: https://autodesk.com
Service for printing your 3D object (if you don’t have/want a printer): https://i.materialise.com
A free CAD program recommended by a friend but I haven't tried: https://www.freecadweb.org/
(a rather new package, bound to still have bugs, but worth keeping an eye on)
Other 3D modeling software:
List: https://www.3ders.org/3d-software/3d-software-list.html
Low cost: http://amabilis.com/products/
Open source community supported: https://www.blender.org/
(Blender is very advanced - intimidating but top end stuff at no cost)
Community CAD for making people: http://www.makehumancommunity.org/
STL reduction:
Blog: http://rasterweb.net/raster/2011/11/14/simplfying-stl-files-with-meshlab/
Software: http://www.meshlab.net/
YouTube video of somebody else demonstrating Tinkercad exporting design to da Vinci Jr printer: https://www.youtube.com/watch?v=lbwoXIhBaBI
XYZ Printing, maker of the da Vinci Jr and other models: http://www.xyzprinting.com/en-US/home
Links back to other fun areas of this web site...