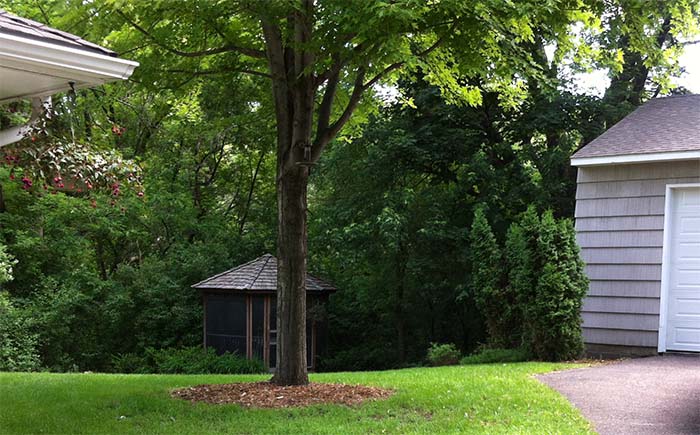
This is the "before" picture. In person, it didn't look as good as this picture. The gazebo hadn't been painted in years and the roof was well worn. The majority of the green stuff around the gazebo is Buckthorn - that's the dandelion of the forest in case you're unfamiliar with it. Buckthorn is not native, and eventually kills all the native trees if left unchecked.
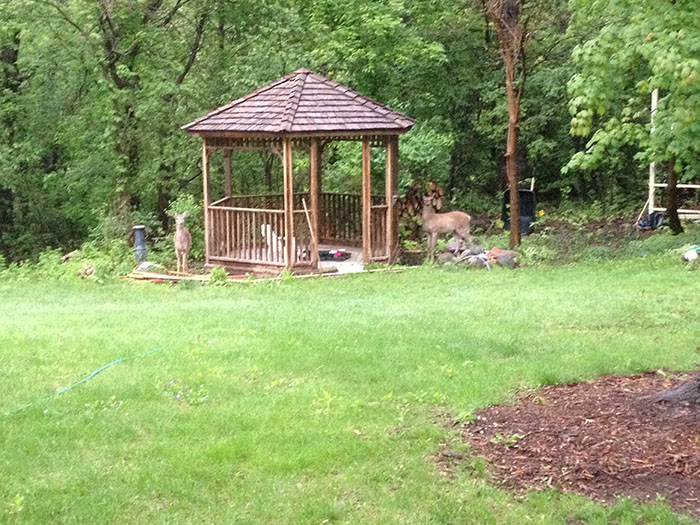
One of the first things you might notice here is that we cleared all that Buckthorn away. The old ripped screen is gone off the gazebo, and Joy is just getting started on staining the roof. About half the 4x4 posts are up.
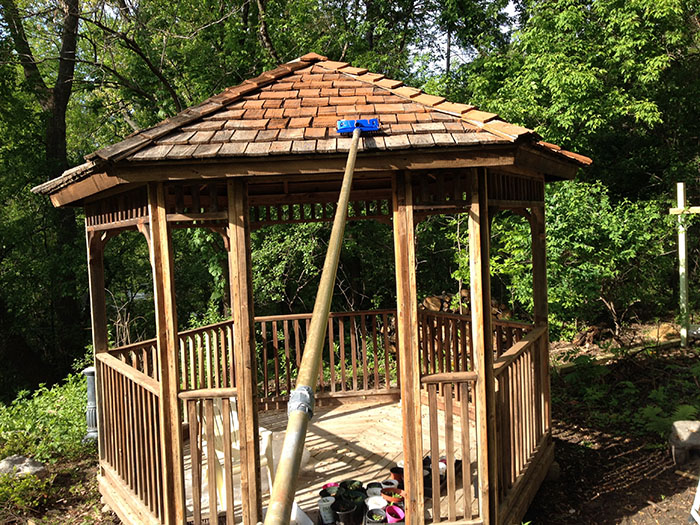
The view from the working end of that very long paint brush that Joy rigged up. Note all the stripped wood inside and out. Joy put a lot of work into this project.
We're busted, the building inspectors showed up for a surprise visit. (Those aren't fake... seriously!)
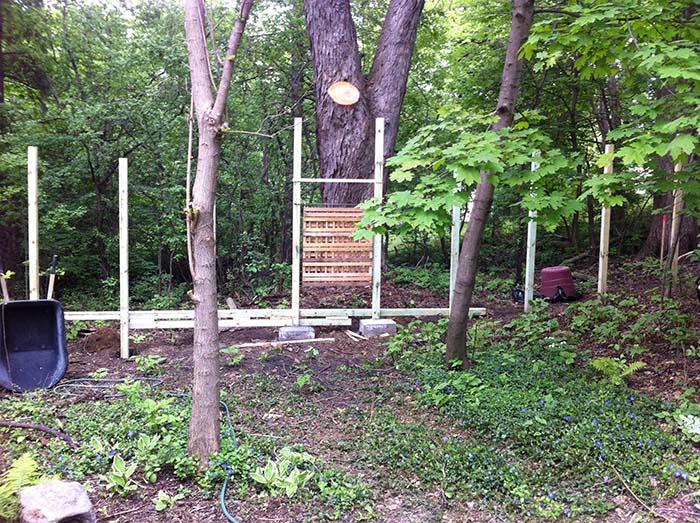
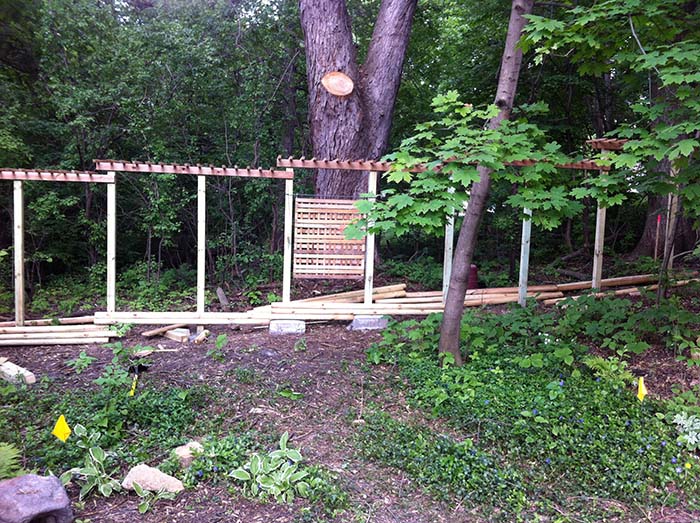
I started digging post holes beginning at the far right in this picture. Digging went well, and I found dirt all the way down. I later concluded the dirt had to have been hauled in. By the time I got to post #4, digging was a painful project. There was hard clay and lots of limestone. Post #5 presented a dilemma. There was a very large tree root in the way just a foot down, a root much bigger than I was willing to simply cut out. I solved the problem by driving multiple lengths of rebar into the ground at least 42 inches, built a form, and poured concrete. The first post anchor used about 4 bags of concrete mix. The next one, done in similar manner, took 3 bags.
Once I got past tree roots, I began to run into rock and clay only a few inches down. The rebar and concrete plan seemed to be working pretty well, but it was really too much concrete. For the rest of the posts, I dug down 12 to 18 inches, drove in the rebar to 42 inches (or until I hit solid rock), and then poured only 1 bag of concrete in the hole. The conrete for these posts was now topping at ground level. No more unattractive monuments that will need to be hidden later.
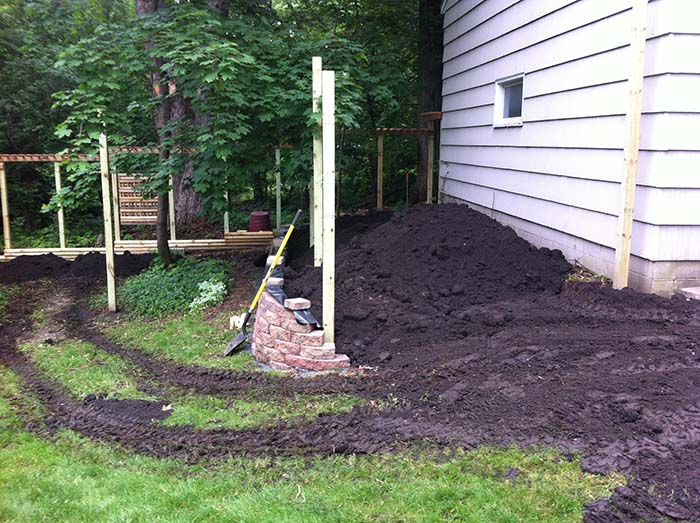
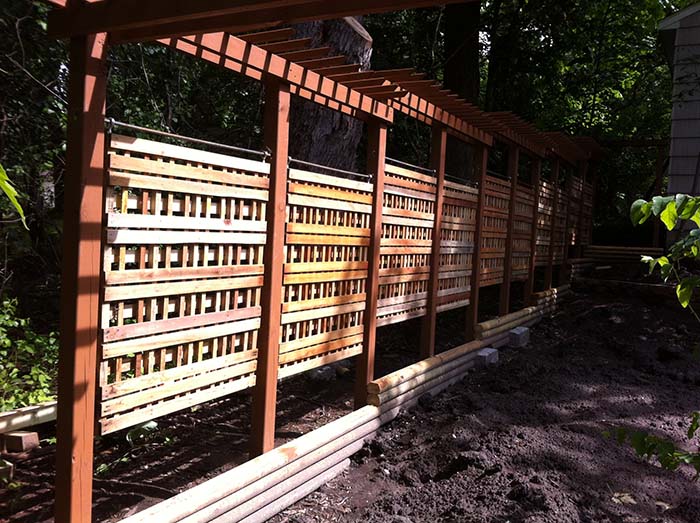
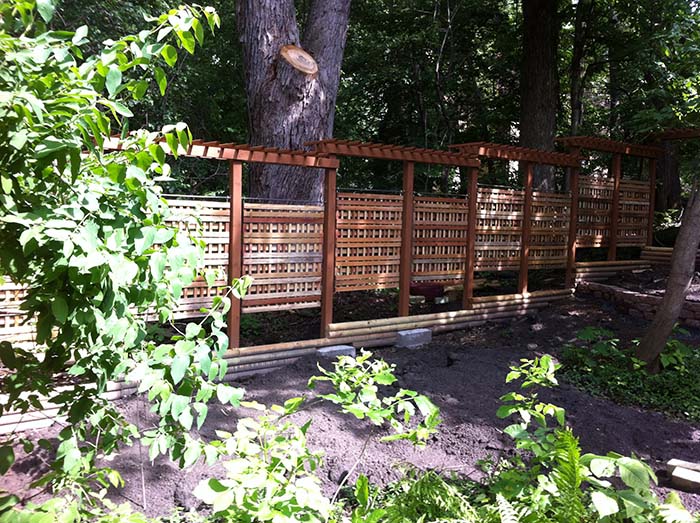
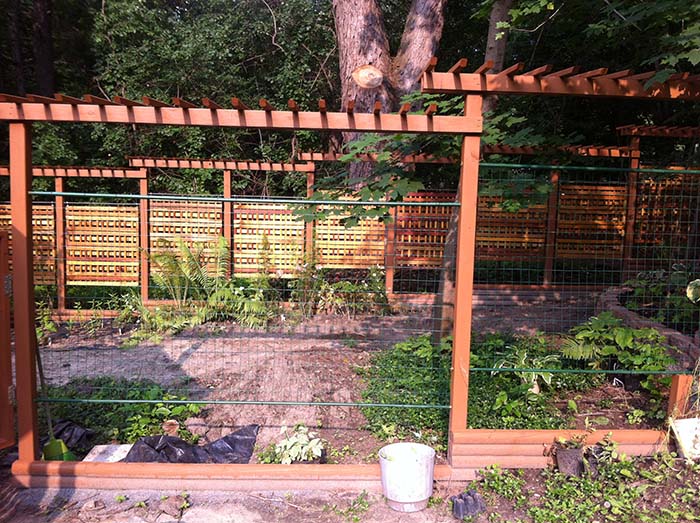
The purpose of the posts was to support a small pergola that would run around the perimeter of the garden, and also hold the trellis panels on the back side. Besides wanting something attractive, we wanted to keep the deer out of this garden. We knew that deer readily jump a 6-foot fence, the maximum fence height allowed by code. But I speculated that a pergola would give the deer a lot more to think about before trying to leap over. The trellis panels would deter them from walking through, and the pergola would deter them from trying to jump over.
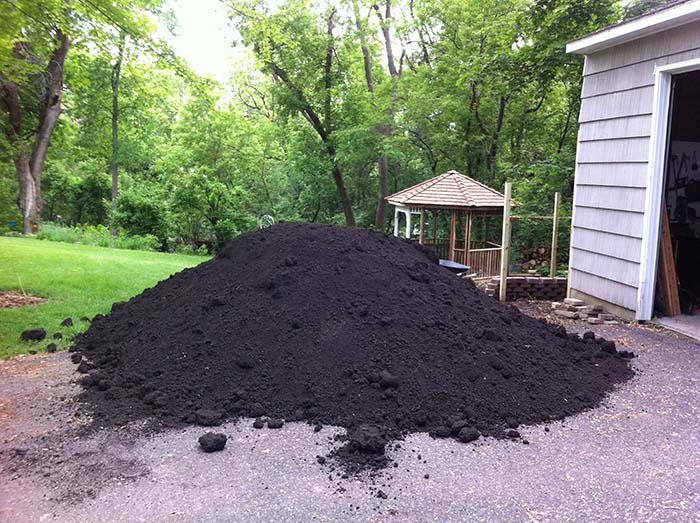
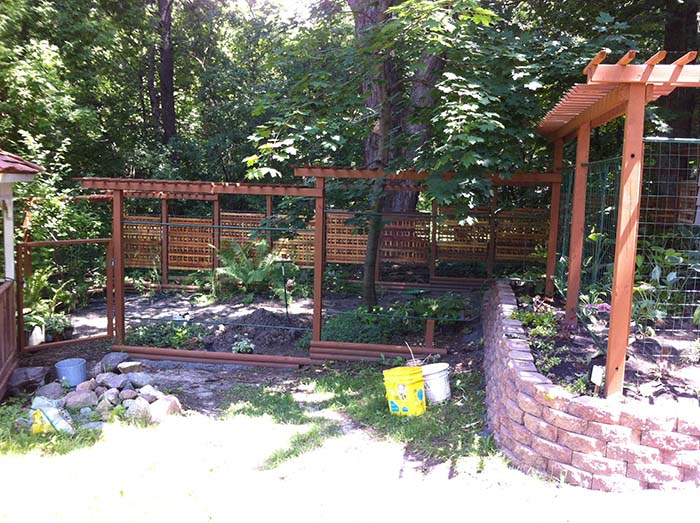
The 10 feet or so closest to the garage was a steep embankment that would not be good planting space. So I decided to terrace that area and fill it with dirt. The railroad garden did not have a monopoly on the dump truck action.
I had some block left over from the railroad raised garden project, so used that here to terrace the garden. More of the posts are also now in place.
These trellis panels are actually recycled shipping pallets, or a form of pallet. They are dividers used in cargo containers coming from overseas. A local entrepreneur, Mark Peltier, discovered that these were being ground up for wood chips and began "rescuing" them from the scrap pile for use in gardens. They are made of mahogany, rosewood and other hardwoods. They are quite pretty unfinished, and when oil stained, are downright beautiful.
And why would they make pallets out of such quality wood? It turns out these come from Malaysia. The company that makes the pallets is really in the furniture business. When they cut large mahogany or other hardwood trees, they use most of the log for furniture. The scraps, or slab wood, are used for pallets.
It is pretty close to finished at this point.
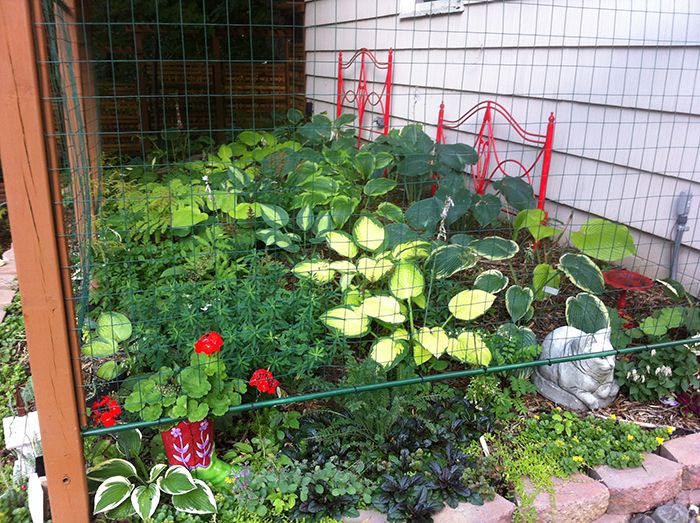
We hung fence wire across the front to keep deer out, without creating much of a visual barrier that would ruin the view.
The gate to enter the garden is seen on the left here.
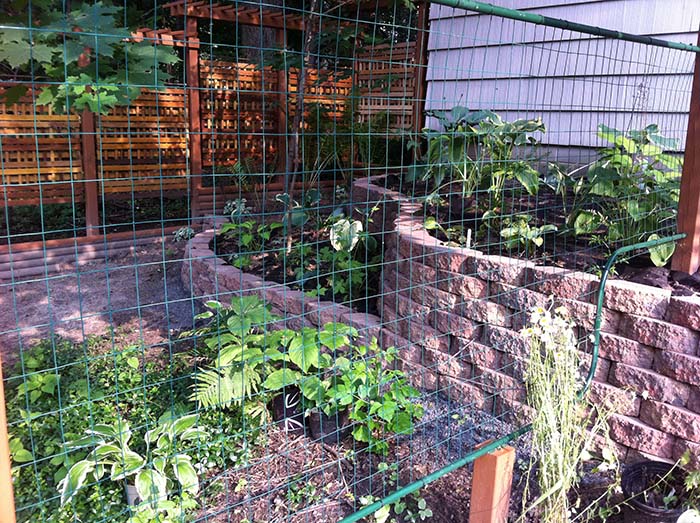
You only see one level of the terrace from the front, but there is more to it toward the back of the garden.
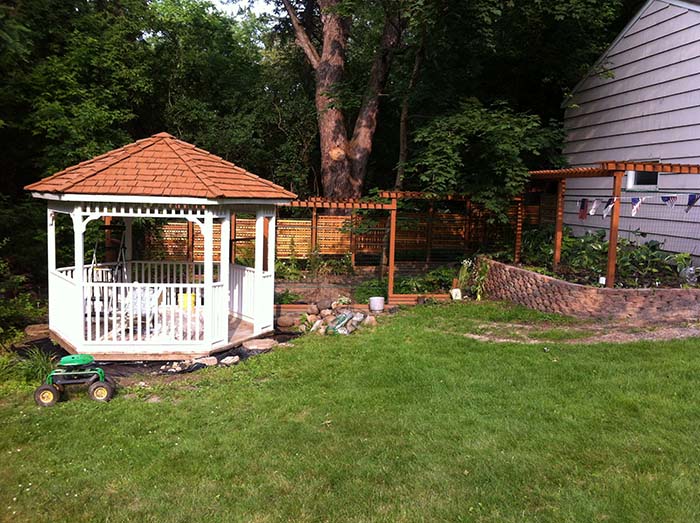
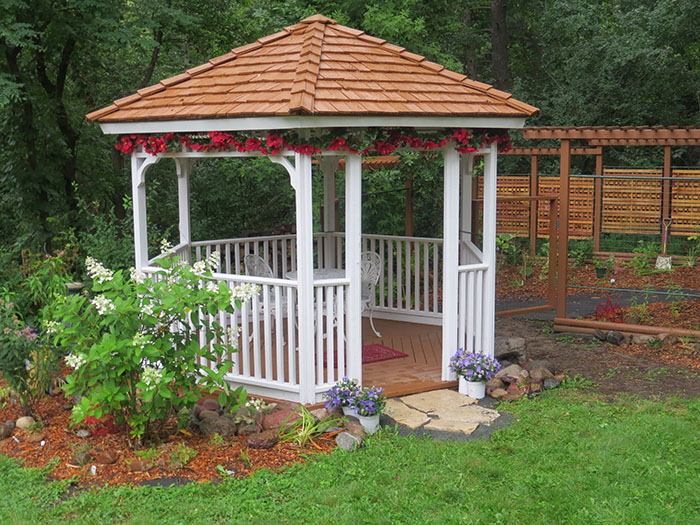
Many people asked, "Did you put a new roof on the gazebo?" No, Joy only stained it, but it looks brand new! So does the rest of the gazebo for that matter. The hostas and a number of other plants have been planted. The garden is mostly done. All that remains on the gazebo is screen and new door. The area in front of the terrace is about to become a rain garden.
This was where we called it good enough for a late summer party. We told Claudia and Greg we were having a "Gazebo Party" to celebrate the completion of the project. It was really a surprise 25th Wedding Anniversary party for them. The biggest challenge of the whole event was trying to convince Claudia we really didn't need help getting ready.
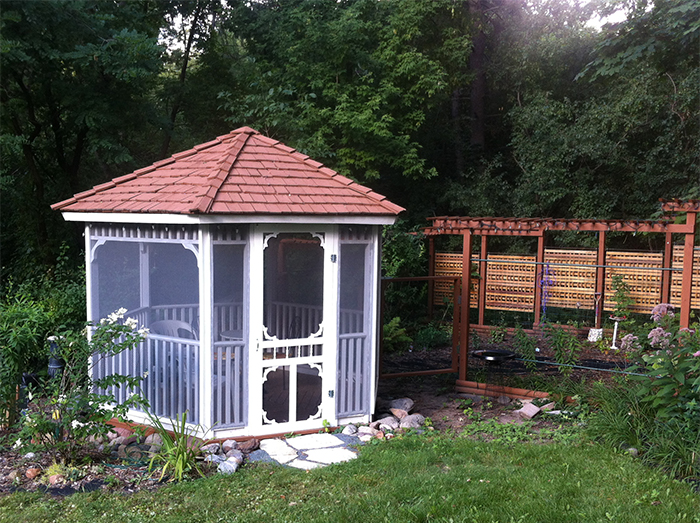
It took all summer, but it is finally done at this point, including new door and new screen all the way around. Although hard to make out due to the lighting in this photo, there is a rain garden on the far right, and a dry creek around the front of the garden coming down from the driveway. Ok, dry most of the time, but it's a river when we get 6 inches of rain. And the rain garden then becomes a pond.
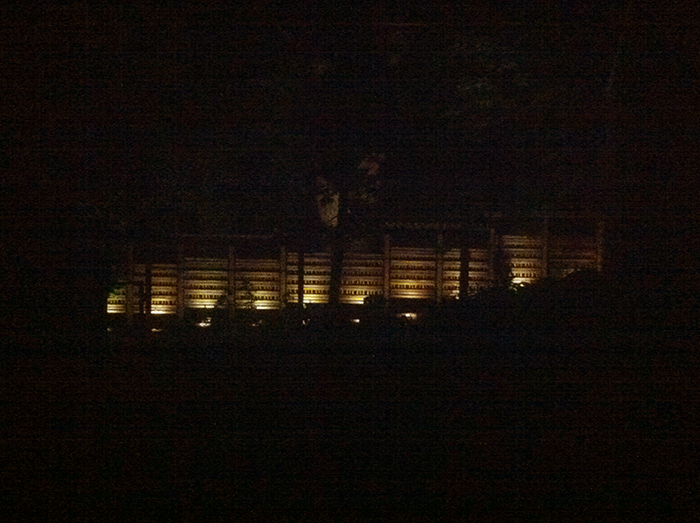
We added one last feature in the spring of 2016 - LED spot lights to light up the trellis panels at night. It looks way more cool at night than this picture can show. Believe it or not, those are only 1 watt lights! LED lighting is awesome! These lights are on a sensor switch to come on automatically at dusk and turn off at dawn (or a few hours after dusk).
This picture was taken August 2016, and shows that the rain garden has filled in nicely.
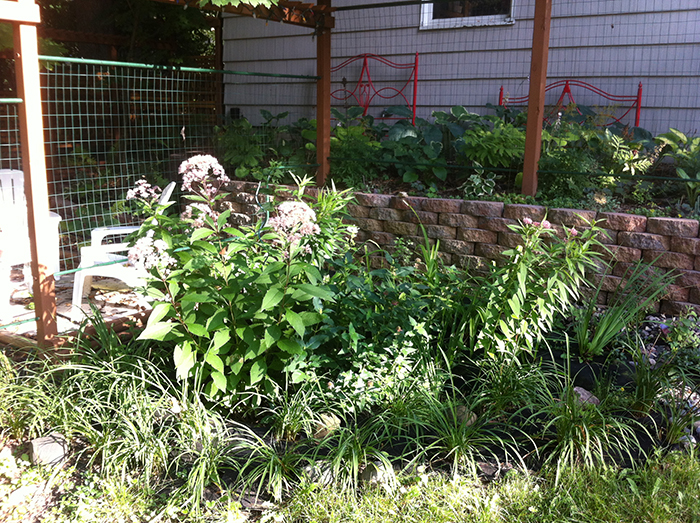
This picture was also taken one year after the Gazebo Garden was initially completed. The Hosta portion of the garden is lush and green!