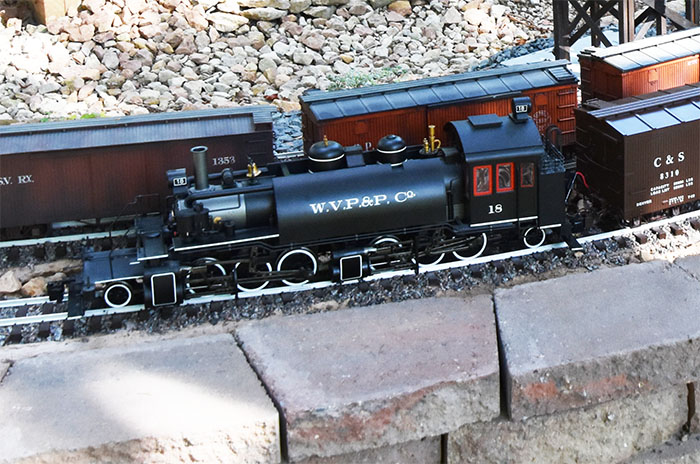
WVP&P 2-6-6-2 Articulated Saddle Tank Mallet
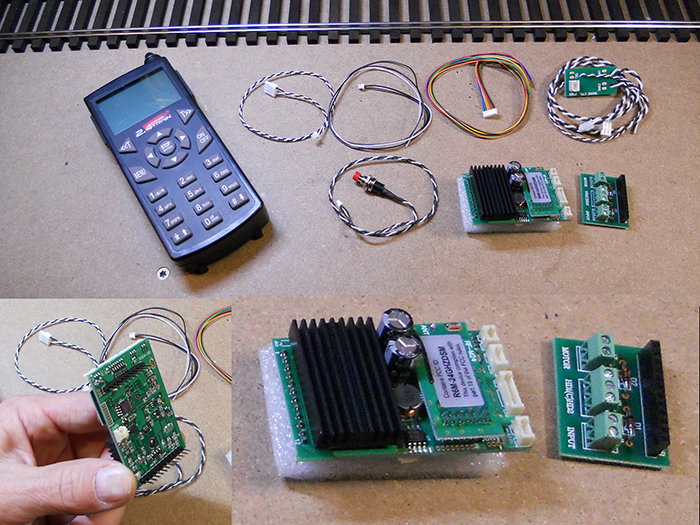
There are pros and cons about track powered locomotives, and there are pros and cons about battery power. I won't try to debate that here, you can do your own research if you like. I chose battery power just because it appealed to me more than track power. I chose Crest Electronics "Revolution" for wireless remote control. It uses the WiFi band for wireless communication, with up to 50 locomotives controlled from one handheld remote. The handheld remote is pictured on the left. Everything else in the picture next to it is what comes in the receiver kit.
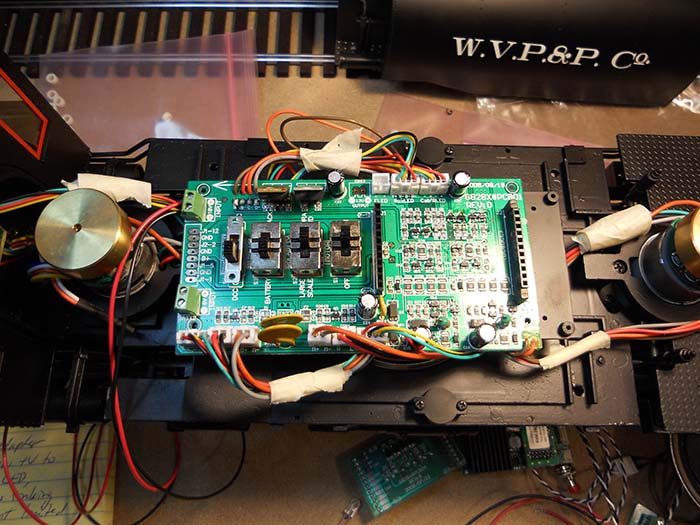
The receiver is the circuit board I'm holding up in the lower left. The pins plug into a socket that is standardized for plug-and-play DCC (digital command control) for control of model trains. The board provides power to the electric motors with variable speed control. It can turn headlights on and off, along with other auxiliary functions. It has a sound output to drive the speaker, producing the steam engine "chuff" sound along with whistle and bell. There is an input for a "chuff sensor", a sensor mechanically linked to the train's axles to synchronize the steam chuff sound rate with the speed of the locomotive. There is another input for a whistle sensor, typically a magnetic pickup that senses a magnet buried in the track to cause the train's whistle to blow automatically every time it passes that spot. Everything else in the picture is an assortment of wires and terminals for getting the receiver wired into a locomotive regardless of whether it has the plug-and-play socket inside the locomotive. The pushbutton is used to "link" the receiver to the transmitter (handheld control), used one time to "learn" the connection. Once the transmitter and receiver find each other, they remember who they are, and you can set aside the pushbutton (or leave it in place in case you want to link to a different transmitter).
The WVP&P Mallet is the only locomotive in my collection with the plug-and-play DCC socket on its internal control board. I started with this one because I figured plug-and-play would be quick and easy. I was wrong about that. There is a reason people joke about "plug-and-pray" instead. I found various blog posts about Bachmann's plug-and-play not playing well.
The locomotive came with just enough of a wiring diagram to start to figure things out. The Crest receiver had some wiring information of its own. I did some searching on the Internet. And luckily, I'm an electronics engineer by profession, so I was able to do enough reverse engineering to figure things out. Anybody trying to retrofit the controls in these locomotives without an electronics background is going to have a rather sad time, I'm sorry to say.
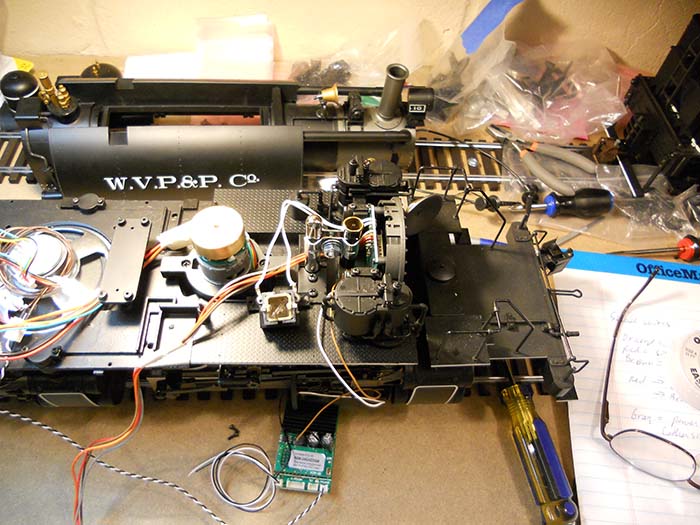
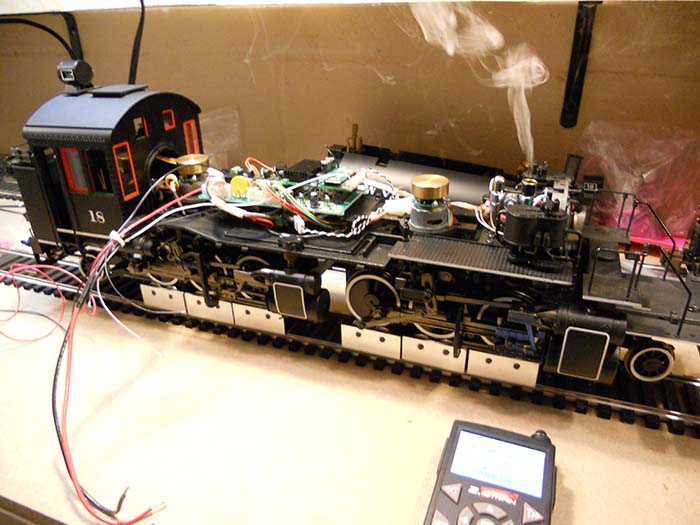
Since I was retrofitting for battery power, one of my concerns is use of power. The smoke unit is a big power pig. The original ran on 12 volts, with a linear regulator dropping track voltage down to 12. Efficiency of such a regulator is maybe 30%. I replaced the regulator on the circuit board with a switching regulator having closer to 90% efficiency. I also replaced the smoke unit with a Pico 5-volt smoke unit. The smoke update takes a lot less power.
I had to get the original control board completely free of the chassis so I could get at both sides to poke around and see what went where. I had to replace a couple of components on the original control board, move some wires around, and hunt for other wires. Also, the receiver did not quite fit in the space provided, so I had to replace the original mounting hardware to lower the board. But that required replacing the original speaker with a lower profile speaker since there wasn't room to lower the board without hitting the original speaker. Yes, it's a can of worms retrofitting the controls.
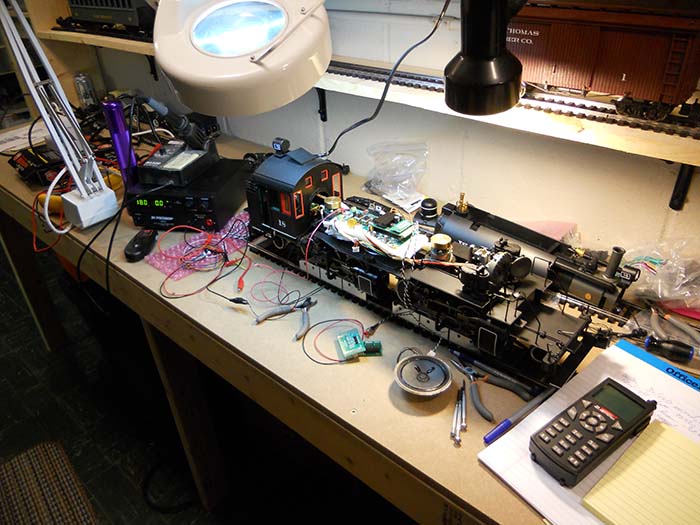
The black box, and light gray box on top of it, at the left hand end of my bench are variable DC power supplies. I use these to initially power the locomotive for test as track powered. Then once rewired, use them as my "battery" to test the newly rewired, remote controlled, battery powered locomotive. The volt/ohm meter (yellow case on right) got lots of use in this project.
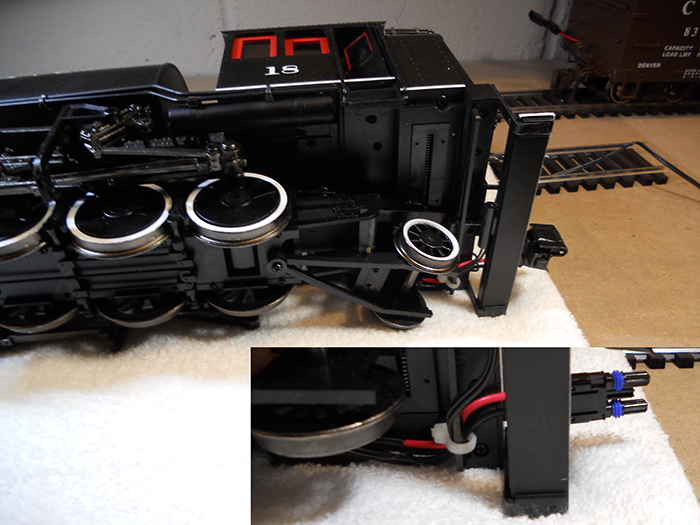
Some models come with a chuff sensor mechanically connected to the drivetrain in some manner. This model touts an optical sensor, and it worked quite well once I monkeyed around enough to figure out which wires to connect where.
The new smoke unit is now fully in place, and the circuit boards are back in place. The loco is up on rollers for some final run testing. Put some juice in the smoker, and... yep, it works.
The magnetic sensor for automatic whistle blowing is seen right behind the back wheels glued to the step board. The saddle tank Mallet does not have a tender (water tanks are on the sides and coal hopper right behind the cab). Therefore, the battery pack will be in whatever car happens to follow the loco. I have a box car set aside for this. The plug coming out the back of the loco is for connecting the battery car.
Many hours later, I can now run this beauty remote controlled, on battery power. The one last detail was first time lubrication. Just watching the video explaining all the lubrication procedures takes 20 minutes, and they routinely show lubricating one set of wheels or gears and then say "now do this in the other 3 places as well". I think I spent an hour lubricating this thing for the first time, using three different types of lubricant as instructed. I guess lots of time spent on lubrication would be true to life for these locomotives.