![]()
I like to run multiple trains simultaneously on my outdoor layout. Even though I clean and inspect all the loops before running, there’s nothing to stop a squirrel overhead from depositing an organic decoupling mechanism on the track while trains are running. I haven't found the pause button on that prolific maple tree either. Since I’m often distracted visiting with guests, I sometimes don’t notice that a train lost a few cars until the loco loops around and smacks into its own caboose. That’s when somebody will finally yell something.
I spent some time conjuring up all sorts of elaborate plans for detecting when a train decoupled. A motion sensor in the caboose was one option. I was contemplating ways to have it sound an alarm to alert me so I could stop the train. Of course, who says I'd hear that anyway. In the end, I came up with the ultimate KISS plan. It requires one relay, some wire, and some connectors. It stops the train automatically, and instantly, without any intervention from me.
I run battery power, so my automatic decoupled car dead stop is very simple to implement. If you run track power, you will need to get a little more creative about how you connect the relay to the onboard controller, but the same concept should be workable with most controllers if you have room in the loco.
The concept for implementing the dead stop on a battery powered loco is very simple. Run the battery power through a relay. The circuit that turns on the relay runs all the way to the end of the train and back via what I'll call the "connect line". If anything becomes decoupled, the slip connectors between each car will disconnect, break that circuit, turn off the relay, kill power, and stop the train instantly.
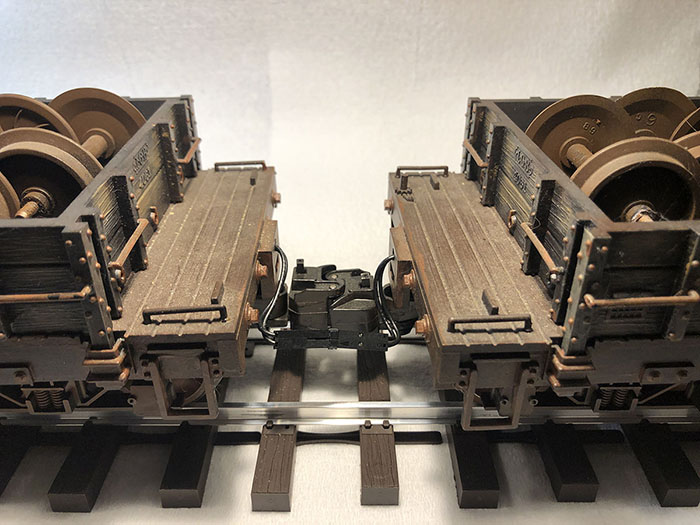
This is what it looks like with the connect line installed on rolling stock and connected. The connect line does not look too far off of what a brake line would look like going from car to car. It doesn't detract too badly from appearance.
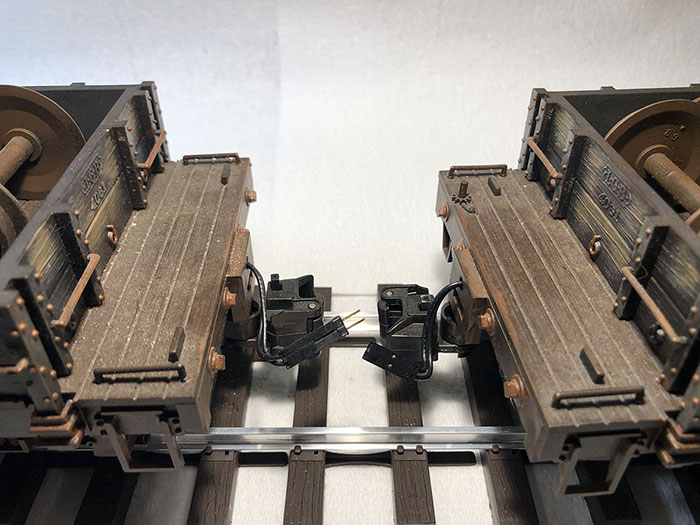
This is what it looks like decoupled. Notice that the pin header that simply slides into the connectors has easily pulled apart, breaking the circuit and immediately stopping the train.

The connect line runs the length of each car with a 2-pin female connector on each end. A 2-pin header is inserted to connect one car to the next. The connect line wires that I used come with terminals on both ends. You can use them as is for short cars, but need to cut the terminals off one end and splice two together for longer cars. You could also buy terminals and a crimp tool and make your own, but unless you need many of them, that is not the lower cost route. Thread the wires through any holes you might need to make before inserting the wires into the connector housing. All you care about is continuity, so there is no concern about polarity here.
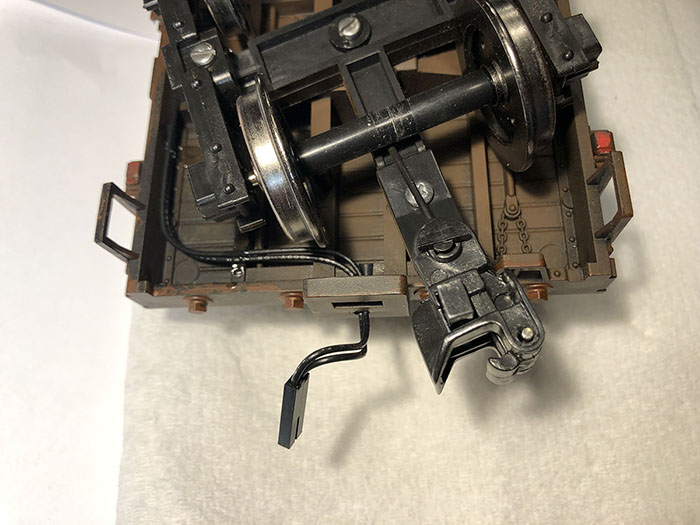
The best place to route the wire will vary from one car to the next, but most often, you can simply glue the wire to the under side with just a few spots of E6000. Clamp in place until set.
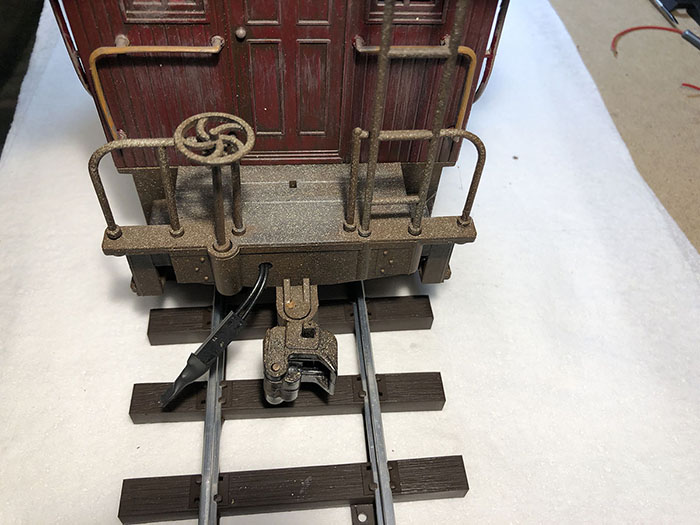
The connector at the end of the train has a special 2-pin header inserted. It simply has a wire shorting the two pins together to complete the circuit. You would not have to bring the connect line out the back end of caboose. You could just terminate the wire under the caboose and have it always be the hidden end of train jumper.
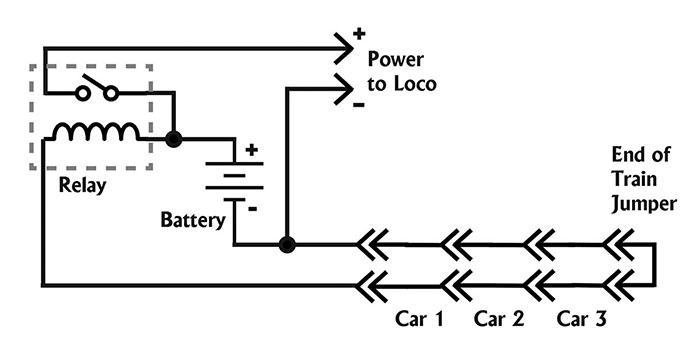
This is the schematic showing the battery and relay located most likely in a tender, plus 3 cars represented. I limited the drawing to 3 cars just to keep it on the page. There is no practical limit. The loco will run out of pulling power sooner than the connect line runs out of signal.
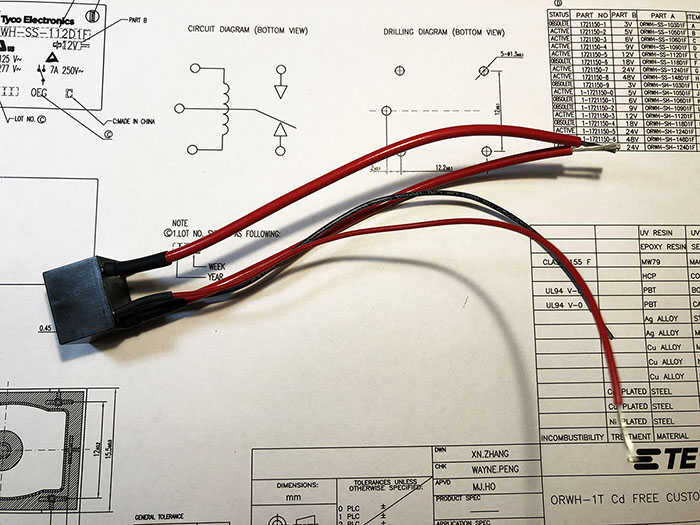
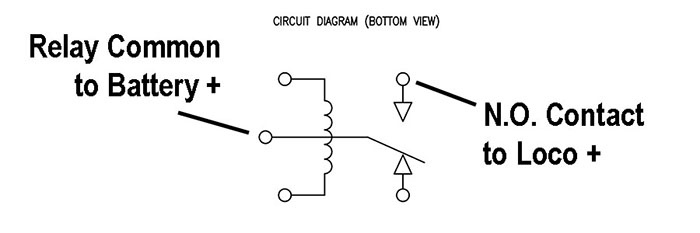
Use the bottom view of the relay as seen on the data sheet to know where to solder wires. The relay I chose has both normally open and normally closed contacts. You want to use the normally open contact.
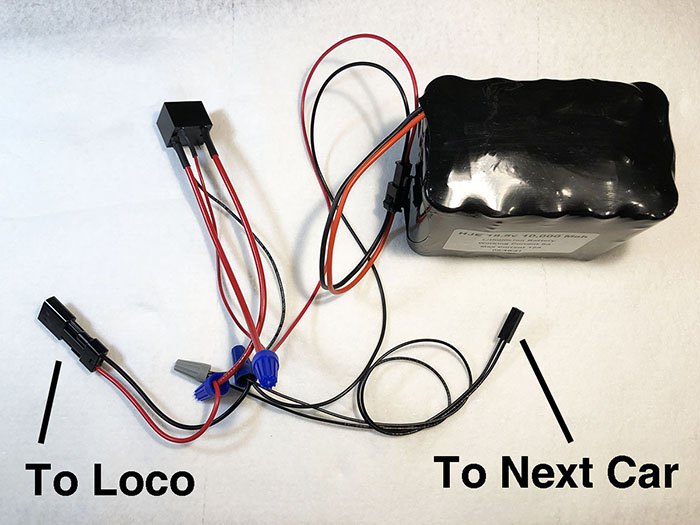
I assembled the entire circuit outside of a car just to show how simple it is with battery power. This setup is ready to be put inside a tender or box car.
My trains run on an 18.5V battery. The relay is listed as having a 24V coil. One needs to check to specifications closely. The relay I used is guaranteed to operate at 16.8V, so I'm ok at 18.5V. Load rating is 10 amps at 28VDC.
Other than the battery and wire, I purchased all of the parts needed from Digi-Key in Thief River Falls, MN (www.digikey.com). They stock millions of parts and are easy to buy from online. My parts list for this project is as follows:
PB2031-ND relay (1 per train)
WM15222-ND wire, pre-crimped (usually 4 per car)
WM2800-ND connector housing (2 per car)
S1021E-36-ND or S1021-02-ND pin header (I buy the 36-pin and cut into 18 pcs, need one 2-pin per car)
My 4-truck Shay is one of the places I have the automatic decoupled car dead stop neatly tucked away. It works beautifully. Even when I am paying attention and watching the train closely, it will almost always stop sooner than I can visibly see a problem. In fact, it works so well that there is often less than an inch of space between the decoupled cars upon stopping and I have to look closely to see where the decoupling is. I'm ready for more trains!